
Virtual desktops
Best Virtual Machine Software in 2026 (Local & Cloud Options)
If I need a Windows VM in 2026, I start with one question: do I want local control, or do
Single-user Windows 10/11
Multi-user Windows Server 2025
Real-World Applications
Discover Our Mission.
Get in touch.
Compliance & VPAT.
Get Answers Here.


Setting up a Windows Server Remote Desktop Services (RDS) environment allows multiple users to access a centralized server for applications and desktops, improving efficiency and security for small businesses. Here’s a quick overview:
This guide covers everything from installation to maintenance, helping you create a secure and efficient RDS setup. For a simpler alternative, consider managed solutions like flexidesktop Team, which handles setup, updates, and scaling for you.
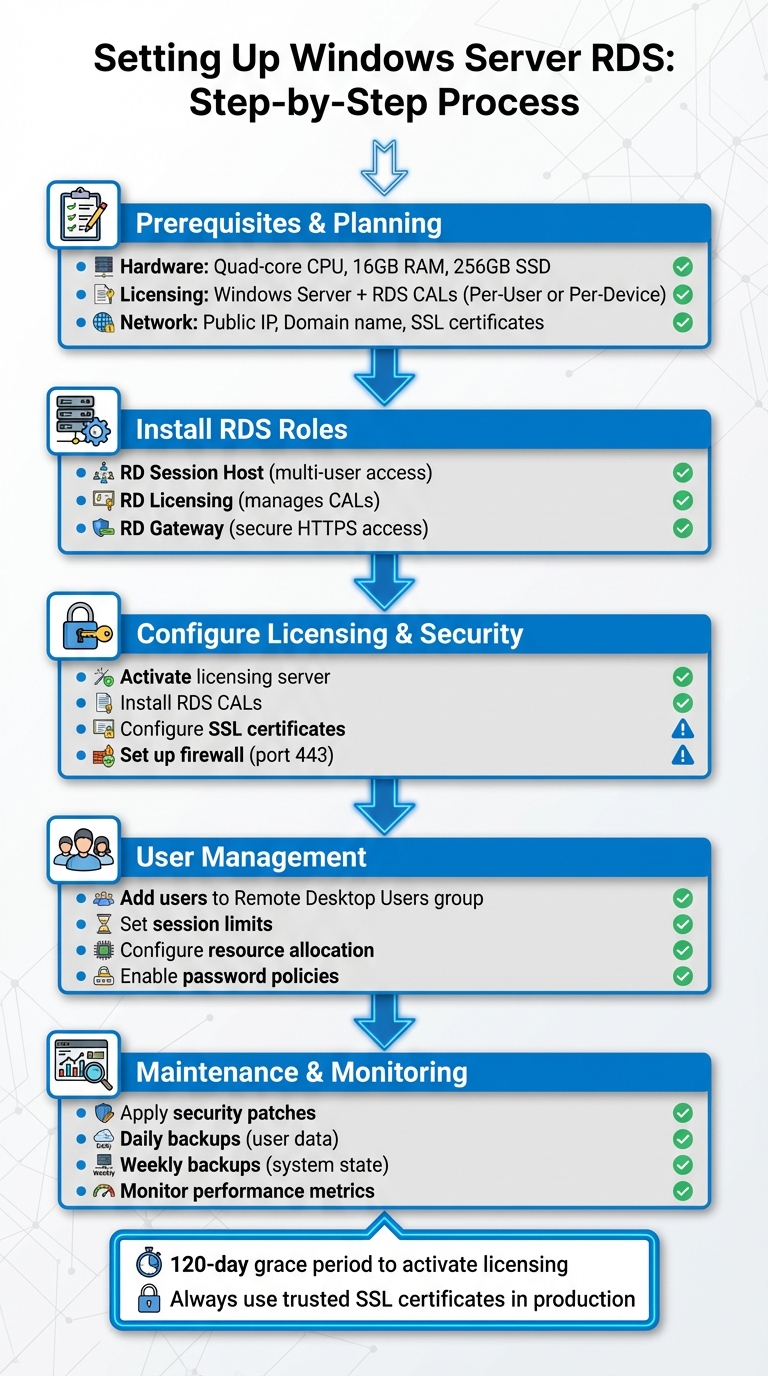
Windows Server RDS Setup Process: 5 Essential Steps
To set up your system, you’ll need a Windows Server version – 2016, 2019, 2022, or 2025. The hardware you choose depends on the number of users and the applications they’ll use. For a small business with 5–15 users running typical office software, aim for at least a quad-core processor, 16 GB of RAM, and 256 GB of SSD storage to ensure smooth performance.
Licensing is just as important as the hardware. Along with a Windows Server license, you’ll need Windows Server CALs (Client Access Licenses) and Remote Desktop Services CALs (RDS CALs) for each user or device connecting to the server. Here’s how to choose between the two CAL types:
| RDS CAL Type | Best For | Flexibility | Enforcement |
|---|---|---|---|
| Per-User | Employees using multiple devices or remote workers | Users can connect from unlimited devices | Administrator ensures compliance |
| Per-Device | Shared workstations for shift workers | License is tied to a specific device | System-enforced |
Make sure your RDS CAL version matches your server version to avoid compatibility problems. After installation, you’ll have a 120-day grace period to set up your licensing server. Activate it early to prevent disruptions.
Once your hardware and licensing are ready, the next step is configuring your network for secure access to Remote Desktop Services (RDS).
To properly set up your RDS environment, you’ll need a public IP address and a registered domain name for your RD Gateway server. The RD Gateway must have an external Fully Qualified Domain Name (FQDN) for its SSL certificate, such as gateway.yourcompany.com. Update your public DNS records so that this FQDN points to your server’s public IP. If your server is behind a router or firewall, use network address translation (NAT) to forward traffic from the public IP to the server’s internal IP.
You’ll also need to configure your firewall to allow inbound HTTPS traffic on port 443 for the RD Gateway server. Secure the setup further by obtaining SSL certificates from a trusted Certificate Authority (CA) for the RD Gateway, RD Web Access, and RD Connection Broker roles. While self-signed certificates are fine for testing purposes, trusted certificates are essential in production to avoid security warnings on client devices.
The RD Gateway role adds an extra layer of security by tunneling Remote Desktop Protocol (RDP) connections through HTTPS. This setup not only encrypts the connection but also lets you enforce multi-factor authentication and apply connection policies, reducing the risk of exposing RDP ports (like 3389) directly to the internet.
Once your network is secure, focus on creating an efficient authentication and storage plan to support multiple users. A properly licensed and secured server makes integrating user accounts – either through Active Directory or local accounts – much easier.
For authentication, Active Directory is the preferred option in environments with more than a handful of users. It’s typically required for standard RDS deployments, and servers hosting RDS roles are usually joined to the domain. While RDS can technically run on a workgroup server, this setup has significant limitations, such as only supporting per-device CALs and requiring PowerShell for administration instead of graphical tools.
Shared storage is another critical component. You can use a dedicated file server, network-attached storage (NAS), or cloud storage mapped as a network drive. Before going live, plan for storage capacity, set quotas if necessary, and establish a reliable backup strategy. Aim to schedule daily backups for user data and weekly backups for the system state. Most importantly, test your restore process at least once to ensure you’re prepared in case of an emergency.
Setting up these RDS roles properly is essential to ensure a secure and efficient multi-user environment.
Start by opening Server Manager and selecting Add Roles and Features. On the Server Roles page, choose Remote Desktop Services. Opt for Role-based or feature-based installation, and then select your server from the server pool.
You’ll need to install these three role services:
Once you’ve selected these roles, the wizard will prompt you to add any necessary features. Accept the default options and proceed through the confirmation screens. The server may restart automatically after the installation is complete. When it reboots, check Server Manager under Remote Desktop Services to confirm that all three roles were installed successfully.
To activate your licensing server, open RD Licensing Manager from the Tools menu in Server Manager. Right-click the server, select Activate Server, and follow the prompts to provide the required credentials. Once activated, immediately select Install Licenses to add your RDS CALs.
During this step, specify whether you’re using per-user or per-device CALs, based on your earlier deployment plans. To associate the RD Session Host with the licensing server, go to Server Manager, navigate to Remote Desktop Services > Collections, and click Tasks, then Edit Deployment Properties. Under the RD Licensing tab, set the licensing mode and add the name of your licensing server. If you’re managing multiple servers, you can also configure licensing through Group Policy. Properly setting up the licensing server is essential for smooth operations and efficient resource management [8].
In production environments, the RD Gateway requires an SSL certificate from a trusted Certificate Authority (CA). The certificate should match your gateway’s public DNS name (e.g., gateway.yourcompany.com). Install the certificate by navigating to Server Manager > Deployment Overview > Tasks > Edit Deployment Properties > Certificates, and assign it to the RD Gateway (and RD Web Access, if applicable).
Next, open RD Gateway Manager from the Tools menu. Create a Connection Authorization Policy (CAP) to define which user groups are allowed to connect through the RD Gateway. Then, set up a Resource Authorization Policy (RAP) to specify the network resources those users can access.
Make sure your firewall is configured to allow inbound traffic on TCP port 443. Also, verify that the public DNS name of your gateway resolves correctly to your server’s public IP address. While the RD Gateway communicates internally with RD Session Hosts over port 3389, external users will only connect via HTTPS on port 443. Test the setup from an external network using the Remote Desktop Connection client, specifying the gateway address in the advanced settings [9].
With these RDS roles installed and configured, you’re all set to move on to managing user accounts and fine-tuning performance in the next steps.
After setting up your RDS roles, the next step is to add users to the Remote Desktop Users group. In domain-based environments, use Active Directory Users and Computers to locate the user or group and assign them to this group. For workgroup servers, you’ll manage local users and groups through Computer Management [2][4].
Additionally, confirm that the “Allow log on through Remote Desktop Services” policy includes the Remote Desktop Users group. To do this, open the Local Group Policy Editor (gpedit.msc) and navigate to Computer Configuration > Windows Settings > Security Settings > Local Policies > User Rights Assignment [4].
To enhance security, enforce password complexity and implement regular password change intervals using Group Policy [2]. Avoid giving administrative rights to RDS users unless absolutely necessary – restricting permissions minimizes security risks [2].
Once user accounts are configured, focus on setting session limits and optimizing resource allocation for better performance.
To manage session limits, open the Group Policy Editor and go to Computer Configuration > Administrative Templates > Windows Components > Remote Desktop Services > Remote Desktop Session Host > Session Time Limits. Configure time limits for idle sessions and disconnected sessions to automatically release resources [2].
To ensure users don’t open multiple sessions simultaneously, enable the “Restrict users to a single session” setting under Computer Configuration > Administrative Templates > Windows Components > Remote Desktop Services > RD Session Host > Connections [2]. Proper session management helps maintain stability and efficient resource use.
For resource allocation, plan based on the expected number of users. While 8GB of RAM is the minimum for basic setups, 16GB or more is recommended for handling multiple concurrent sessions [2]. Use SSDs or NVMe drives to improve disk I/O performance and disable unnecessary background services to free up CPU resources [2]. To conserve network bandwidth, enable RemoteFX compression, and ensure both display and network adapter drivers are up to date [2].
Once session limits are configured, continuous monitoring is essential to identify and resolve performance issues as they arise. Use the qwinsta command in a command prompt to check active RDP sessions [11]. For more detailed insights, open Performance Monitor and track key metrics like CPU usage, memory consumption, disk I/O, and network throughput.
For diagnosing session-related problems, rely on Event Viewer. Navigate to Windows Logs > System and Applications and Services Logs > Microsoft > Windows > TerminalServices to review logs for connection attempts, authentication failures, and licensing errors. If sessions fail to disconnect after the configured timeout, double-check your session limit policies to ensure they’re properly applied [2].
A common issue, “The number of connections to this computer is limited and all connections are in use right now,” can be resolved by increasing the “RD maximum connection allowed” setting. Use the Local Group Policy Editor to navigate to Computer Configuration > Administrative Templates > Windows Components > Remote Desktop Services > Remote Desktop Session Host > Connections and set the value to a higher number, such as 999,999 [11]. For profile-related errors, verify permissions on user profile directories or confirm that User Profile Disks (UPDs) or FSLogix are configured correctly [2].
Regularly review policies and adjust them based on monitoring feedback to maintain a secure and efficient RDS environment.
Plan Windows updates during off-hours to minimize disruptions, and notify users ahead of time to ensure they’re prepared. When dealing with multiple session hosts, stagger the patching process to maintain adequate capacity for users.
Before rolling out major updates, always test them in a non-production environment. Confirm that all RDS roles are functioning properly after updates, including user connectivity, active licensing, and access to the RD Gateway. Use the Event Viewer to check for any errors, especially in the TerminalServices logs, after applying updates. Keep detailed records of updates and any issues encountered to make troubleshooting easier in the future.
These update practices work hand-in-hand with the backup strategy discussed below.
A solid backup plan safeguards both your server configuration and user data. Make it a priority to back up the system state of your RDS server, which includes registry settings, Group Policy configurations, and RDS role configurations. If you’re using User Profile Disks (UPDs) to store user data and settings, ensure regular backups of the file shares where these disks are stored [5][2].
For high availability setups, pay special attention to your RD Connection Broker. If it relies on an SQL database for session management and load balancing, establish reliable backup procedures for that database [12]. This database holds critical deployment data that would be challenging to recreate manually. Similarly, if you’ve configured RD Gateway for high availability, document its configuration and certificate settings [3][1][6]. Regularly testing your disaster recovery plan by restoring backups on a separate system ensures your RDS environment remains stable and recoverable.
As your user base grows, keep a close eye on resource consumption to identify when upgrades are needed. Use trends in resource usage metrics to guide your scaling decisions. If users experience slowdowns or resource usage stays consistently high, consider upgrading RAM, storage, or adding more session hosts.
Tools like RD Gateway Manager provide insights into connection details and operational logs, helping you analyze usage patterns [6][7]. Additionally, monitor the Event Viewer for login-related events, such as Event IDs 4624 and 4625. In the Terminal Services Gateway operational log, key events to track include Event 312 (connection initiation), Event 200 (successful credential checks), Event 300 (resource authorization policy compliance), and Event 302 (successful connections) [7]. These metrics are invaluable for predicting when you’ll need to scale up your infrastructure, ensuring performance remains consistent as demand increases.
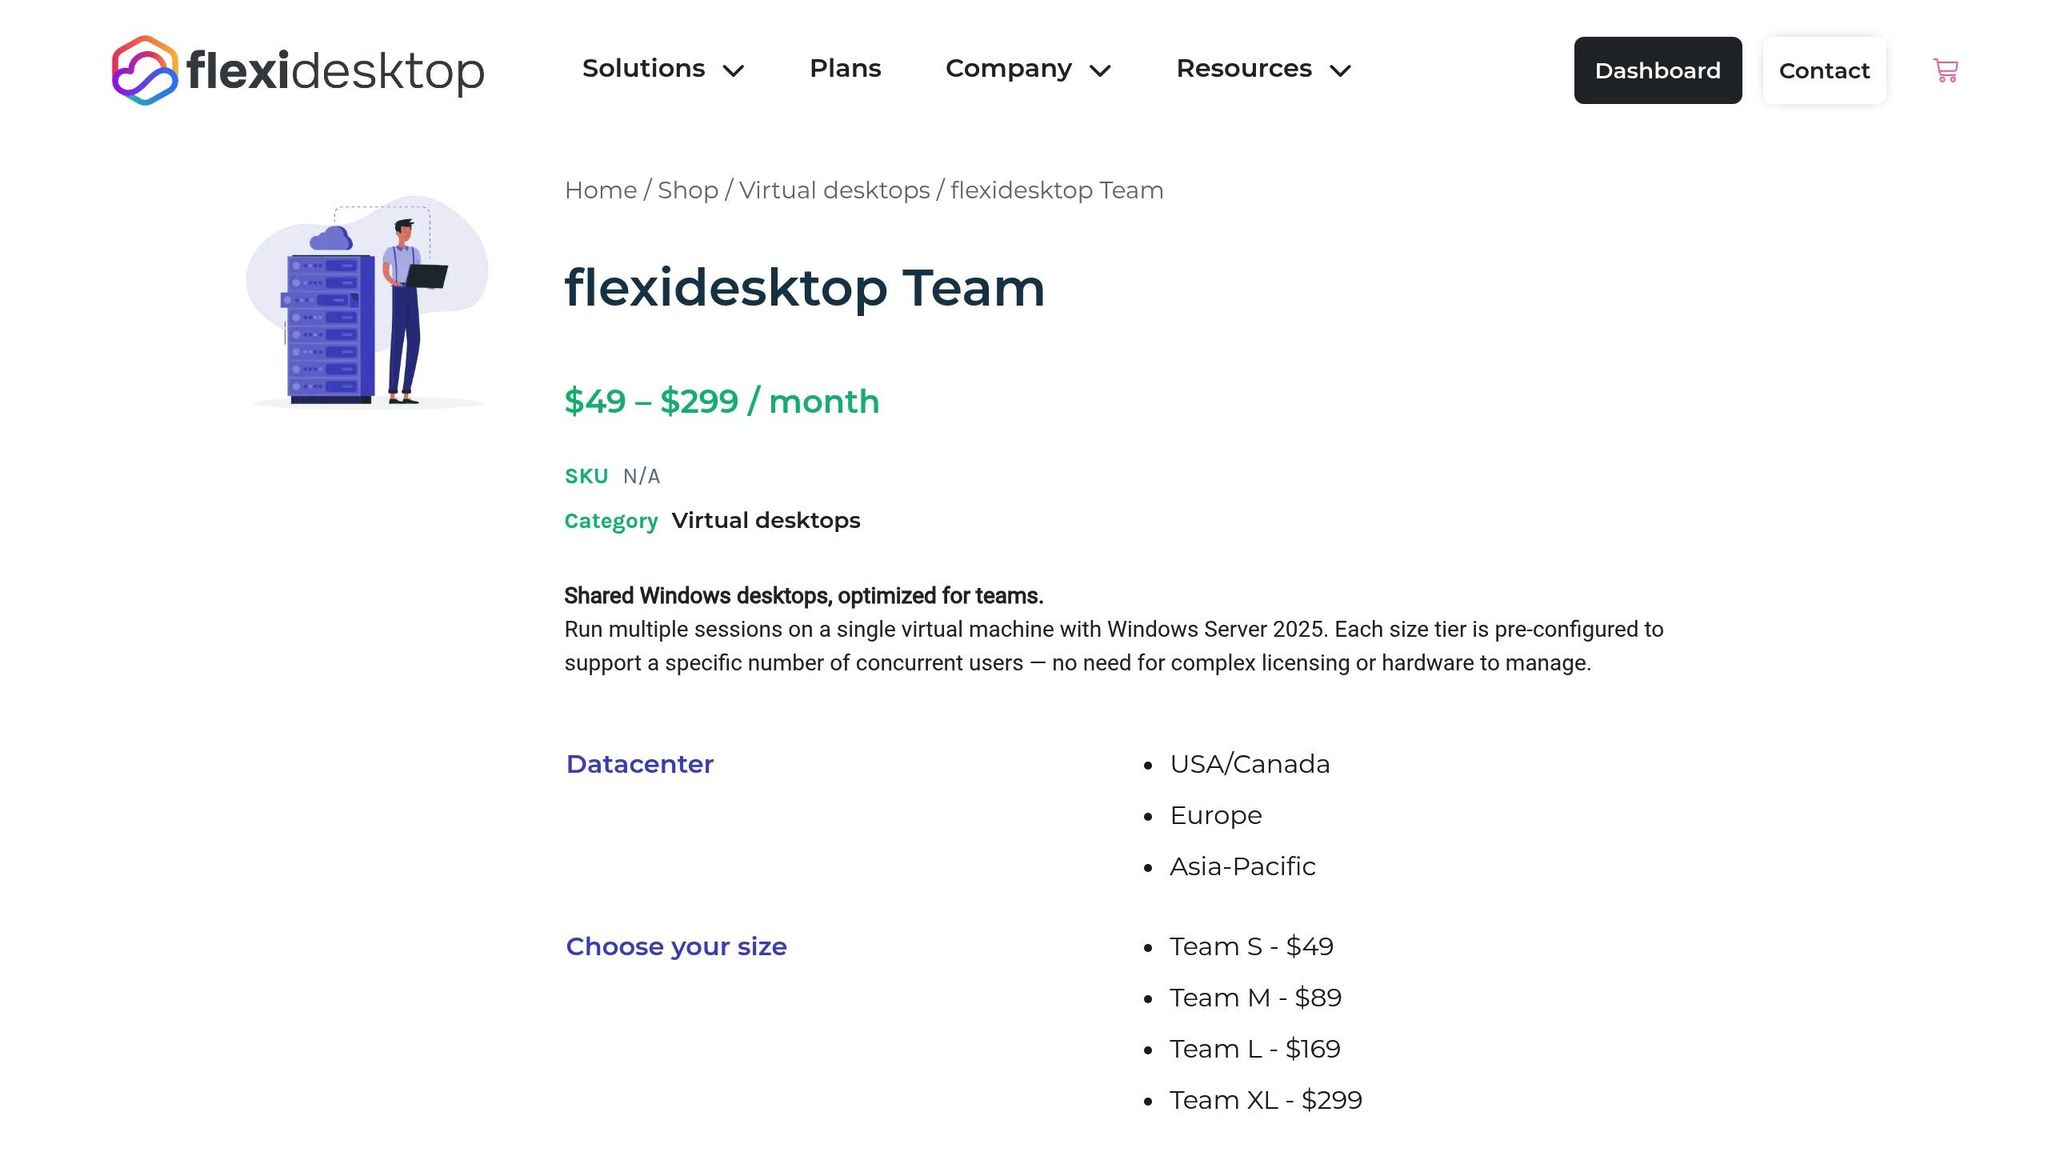
Setting up and managing a self-hosted Remote Desktop Services (RDS) deployment can be a complex and time-consuming task. That’s where a managed solution like flexidesktop Team steps in to simplify operations.
With flexidesktop Team, you get a cloud-hosted, multi-user Windows desktop environment without the hassle of manual RDS configuration. Forget about installing and maintaining RD Session Host, RD Licensing, and RD Gateway roles yourself. Instead, the service provides a preconfigured setup, complete with secure VPN access and centralized user management. This eliminates the need for manual account creation, session limit adjustments, and troubleshooting licensing issues.
One of the standout features is its flexibility. The platform automatically handles resource allocation and scaling. As your team grows, you can easily adjust CPU, RAM, and storage through a management interface – no need to rebuild your infrastructure or add new session hosts. Plus, daily backups, automated Windows updates, and security patches ensure your system stays up-to-date without manual intervention.
Here’s a closer look at how flexidesktop Team compares to a self-hosted RDS deployment.
| Aspect | Self-Hosted RDS | flexidesktop Team |
|---|---|---|
| Initial Setup | Install multiple roles (RD Session Host, RD Licensing, RD Gateway), obtain SSL certificates, configure CAPs/RAPs, and set up licensing | Provision the environment via a simple web interface |
| Licensing | Purchase and install RDS CALs, activate the license server, and configure session hosts | Licensing is included in the subscription |
| Security Configuration | Set up RD Gateway, manage SSL certificates, and configure firewall rules for port 443 | Comes with preconfigured VPN access and managed security |
| Maintenance | Plan and test updates, monitor logs, and troubleshoot connection issues | Updates and monitoring are fully automated |
| Scaling | Add hardware, install more session hosts, and configure load balancing | Adjust resources directly through the interface |
The key difference lies in the operational workload. Managing a self-hosted RDS setup demands expertise in Windows Server administration, Active Directory, and network security. In contrast, flexidesktop Team shifts these responsibilities to the service provider, freeing up your IT team to focus on strategic, business-critical projects instead of routine infrastructure management.
Setting up a self-hosted Windows Server RDS environment is no small feat. It requires not only technical expertise but also ongoing effort to manage its many moving parts. From configuring public DNS records to enabling Network Level Authentication and auditing RDP logs, every step demands meticulous attention. And the challenges don’t end after deployment – security, licensing, and configuration issues remain constant companions.
Once operational, the environment demands regular maintenance. This includes applying security patches, managing user profiles, troubleshooting connection issues, and scaling resources as your team grows. For small businesses without a dedicated IT team, this workload can quickly become overwhelming, turning what might seem like a cost-saving solution into a time-consuming burden.
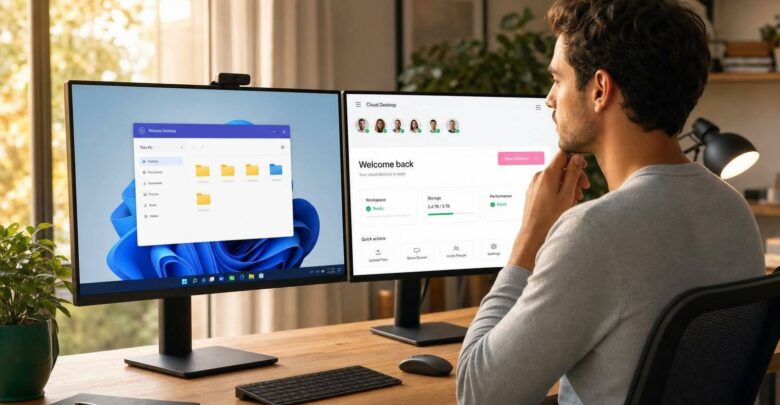
This is where a managed solution can make life easier. With flexidesktop Team, you get a fully functional multi-user RDP environment – ready to go without the weeks of setup and troubleshooting. Security, updates, backups, and scaling are all handled for you, allowing your team to focus on what matters most: growing your business.
If you’re looking for a way to provide secure, multi-user Windows access without the headaches of self-hosting, flexidesktop Team offers a straightforward and efficient alternative. It’s the full RDS experience – minus the technical hassle.
For a small Windows Server RDS setup, choosing the right hardware is all about finding the sweet spot between cost and performance to support multiple users effectively. While the operating system itself requires a minimum of 2 GB of RAM (though 4 GB is better), a 64-bit processor, and error-correcting memory (ECC), practical setups for 5–10 users usually look like this:
If you’re planning for slightly larger setups or anticipate heavier workloads, you might want to bump up the RAM to 64 GB or more. Also, make sure your storage system is equipped to handle high IOPS demands. This setup strikes a balance between affordability and performance while allowing room for growth down the road.
RD Gateway serves as a protective bridge for Remote Desktop Services, providing a secure way to connect while safeguarding sensitive data. Instead of leaving native RDP traffic exposed on port 3389, RD Gateway encapsulates it within an HTTPS connection. This encrypted session, secured with an SSL/TLS certificate, ensures that credentials and session activity remain private. By using port 443, it also avoids the need to directly expose internal RDP servers to the Internet.
But RD Gateway doesn’t stop at encryption. It adds another layer of protection with authentication and policy-based access controls. Users are required to authenticate through the gateway first, often leveraging Network Level Authentication (NLA). Administrators can then define detailed policies to control access – specifying which users or groups can connect to certain internal resources. This setup allows for features like multi-factor authentication, restricting unauthorized access, and limiting sessions to specific servers.
By combining encrypted connections, strict authentication, and granular access controls, RD Gateway minimizes vulnerabilities and reinforces security in environments with multiple users relying on RDP.
With flexidesktop Team, offering multi-user remote desktop access becomes hassle-free. It eliminates the need to set up and maintain a self-hosted Windows Server RDS environment. Forget about installing RDS roles, configuring licenses, securing remote access, or handling ongoing maintenance – flexidesktop Team delivers a fully managed, ready-to-use solution.
This service offers secure RDP access, centralized user management, and advanced features like integration with Microsoft Entra Domain Services or your on-premises Active Directory. It’s an efficient option for organizations seeking the advantages of multi-user remote desktops – without the headaches of managing an RDS setup.
Israel de la Torre is the founder of flexidesktop and has spent 15+ years working in cloud infrastructure and Windows virtualization. He helps businesses migrate from on-premises Windows setups to managed cloud desktops.
If I need a Windows VM in 2026, I start with one question: do I want local control, or do
Compare remote-access apps and cloud desktops to choose the right RDP alternative—use remote tools for occasional access or cloud PCs for always-on team work.
Cloud-hosted Windows is the easiest, safest way to run Windows apps on a Chromebook without hacking ChromeOS.

Compare running Claude Code 24/7 on local PC, Linux VPS, or Windows cloud desktop—tradeoffs in cost, reliability, and setup.
Step-by-step Windows guide to install OpenClaw, fix common errors, and run it 24/7 with PM2, Scheduled Tasks, or cloud/VPS hosting.

Avoid missed deadlines and lost clients with a cloud PC—access your desktop and files from any device with daily backups.
Cloud Windows desktops beat local and VPS setups for reliable, GUI-based 24/7 automation.

Local virtualization or cloud desktops — weigh performance, cost, and convenience when running Windows apps on a Mac.

Guide for law firms choosing secure Windows cloud desktops: prioritize security, Windows app compatibility, uptime, and transparent pricing.


