
Tutorials
How to Create an Administrator Account in Windows: Step-by-Step Guide
Learn how to create an administrator account in Windows using Computer Management or Command Line. Step-by-step instructions included!

Single-user Windows 10/11
Multi-user Windows Server 2025
Real-World Applications
Discover Our Mission.
Get in touch.
Compliance & VPAT.
Get Answers Here.
One of the most common questions from new flexidesktop users is how to move files between their physical computer and their cloud PC. The good news: you don’t need to install anything or configure network shares. flexidesktop includes a built-in Shared Drive that lets you upload and download files directly from your browser, in just a few clicks.
This guide covers both directions:
Important: these steps apply when you connect to your flexidesktop through the web browser. If you connect via RDP (Remote Desktop) instead, file transfer works differently and isn’t covered in this tutorial.
Once you’re connected to your flexidesktop cloud PC through the browser, press Ctrl + Alt + Shift to open the side menu. This reveals several options, including a Shared Drive section.
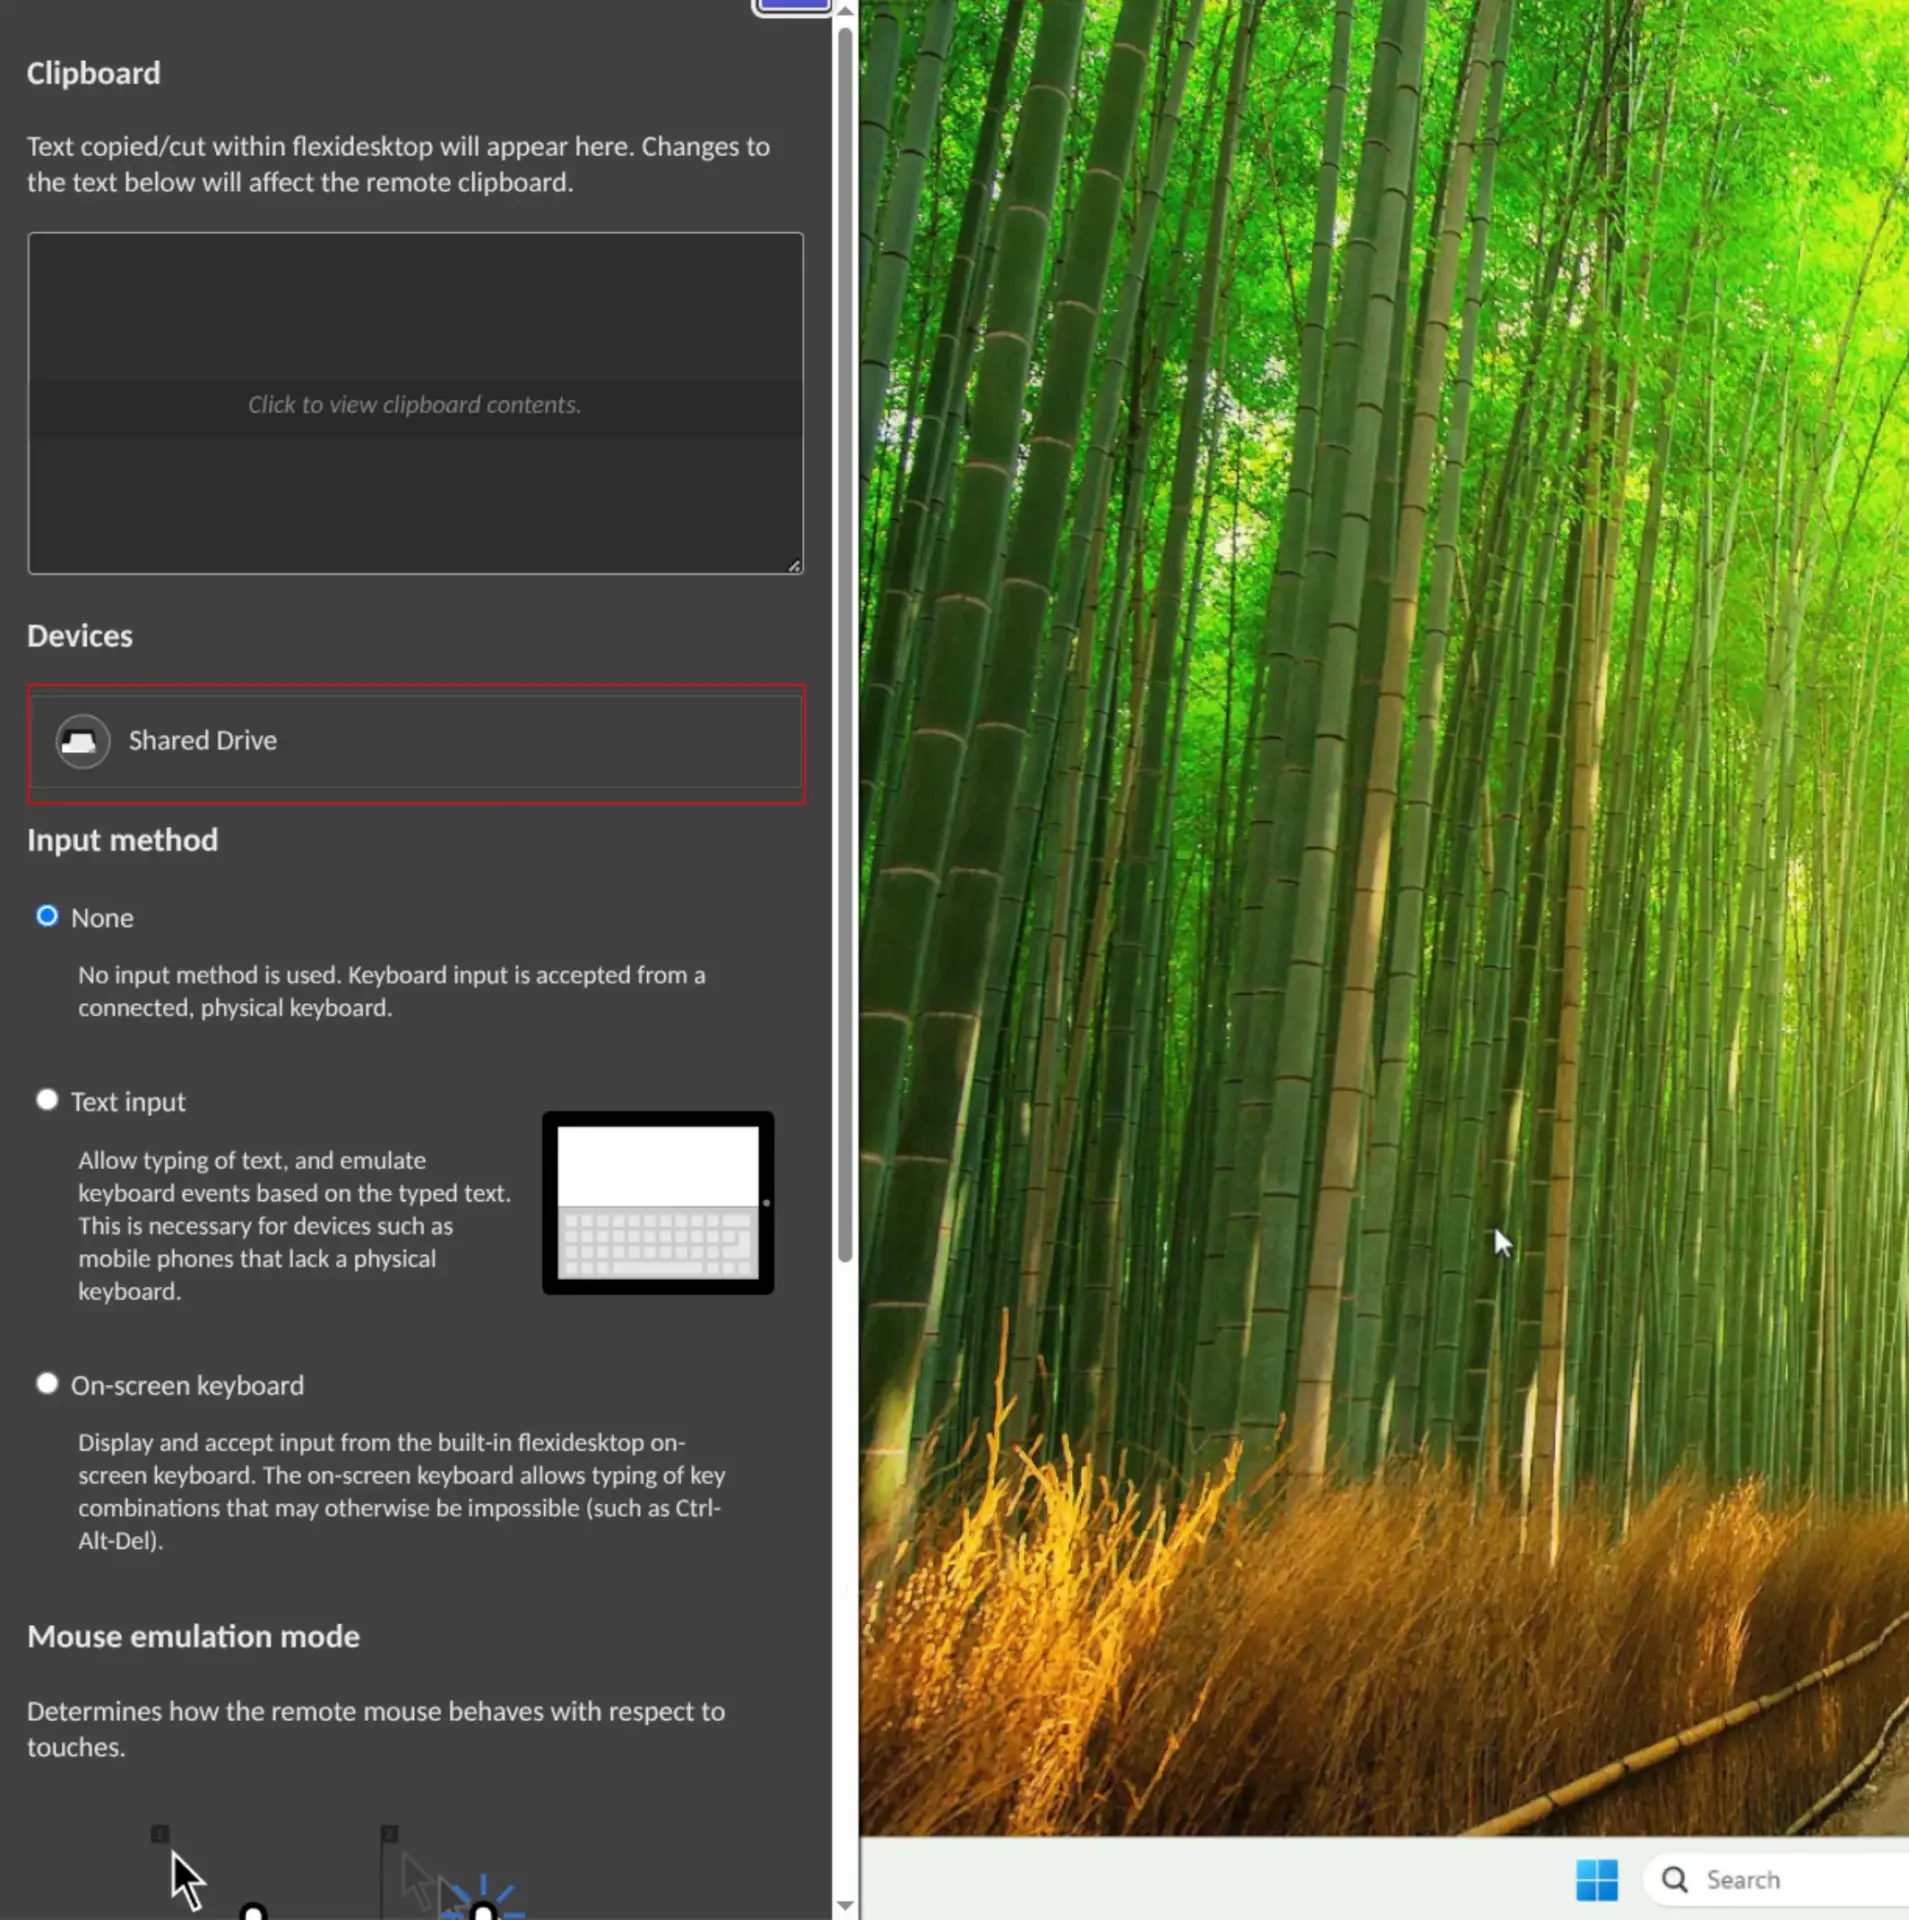
Click on Shared Drive to open the file tree of your virtual drive. The first time you open it, it will be empty except for a Download folder, which is created automatically.
Good to know: the Shared Drive has a 2 GB storage quota. It’s meant for moving individual files in and out, not as permanent storage — once a file is on your cloud PC (or downloaded to your physical PC), you can safely remove it from the Shared Drive to free up space for the next transfer.
To send a file from your physical computer to your flexidesktop, follow these steps:
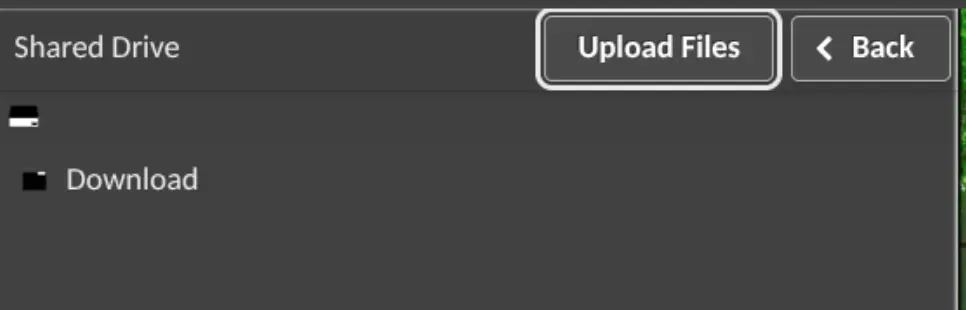

Once the transfer finishes, switch to your flexidesktop’s own File Explorer and go to:
This PC → flexidesktop Web Drive
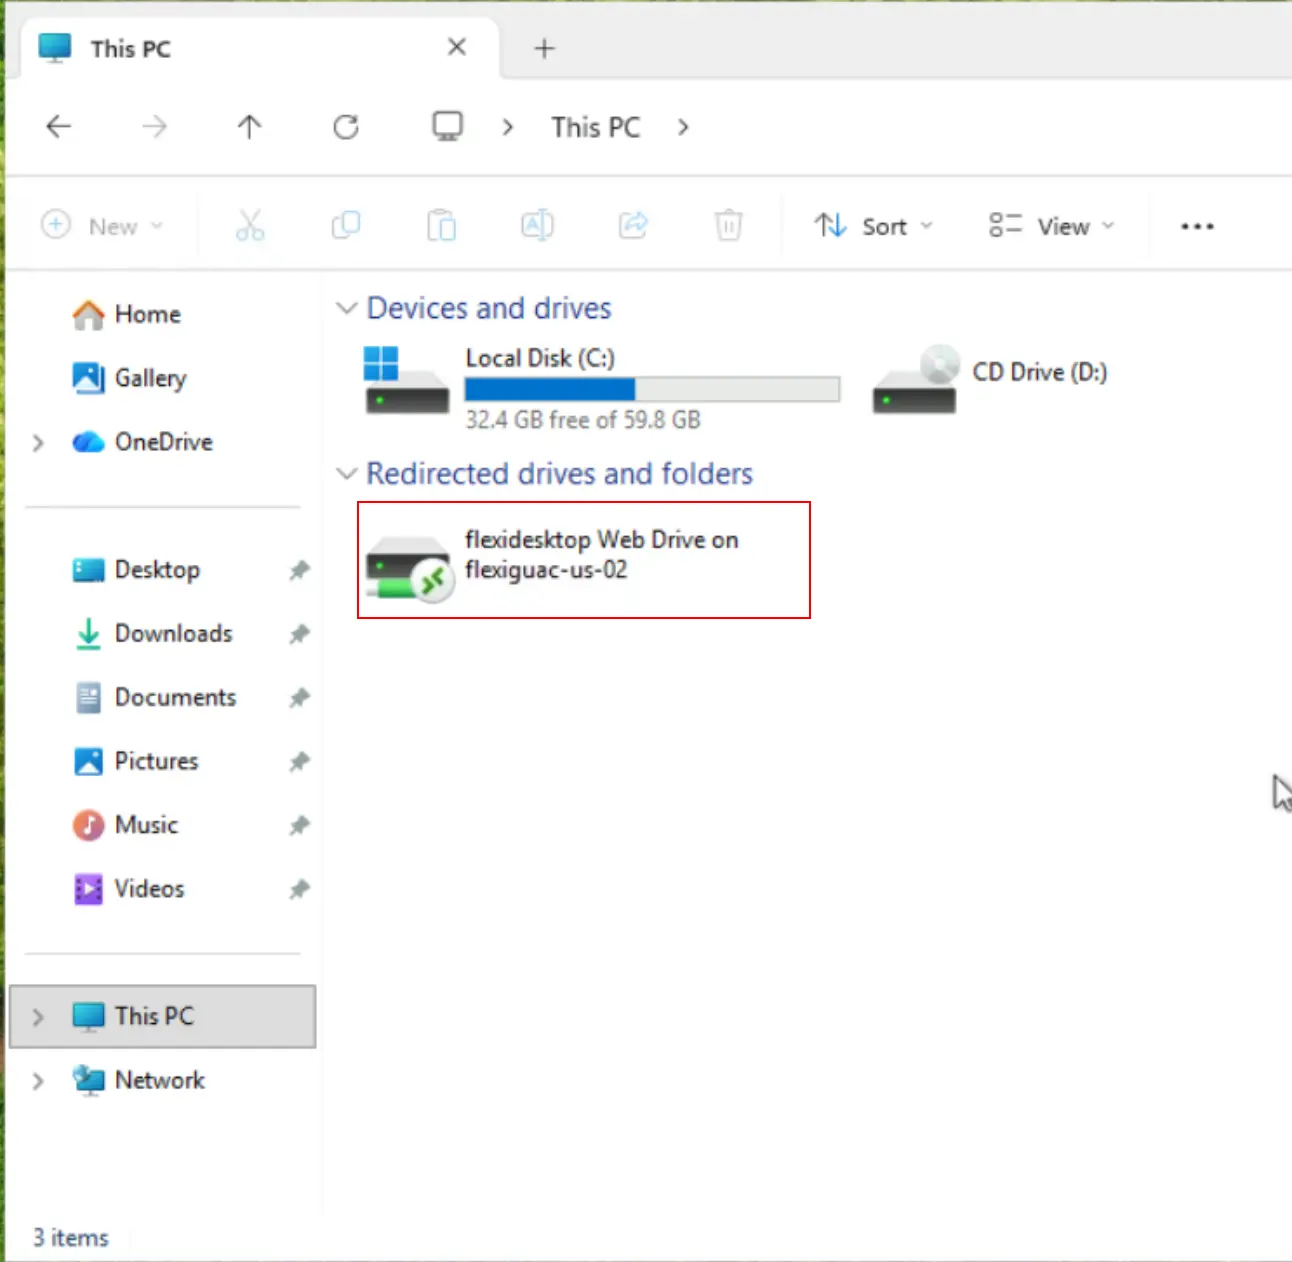
Open it, and you’ll find the file you just uploaded, ready to use like any other file on your cloud PC.
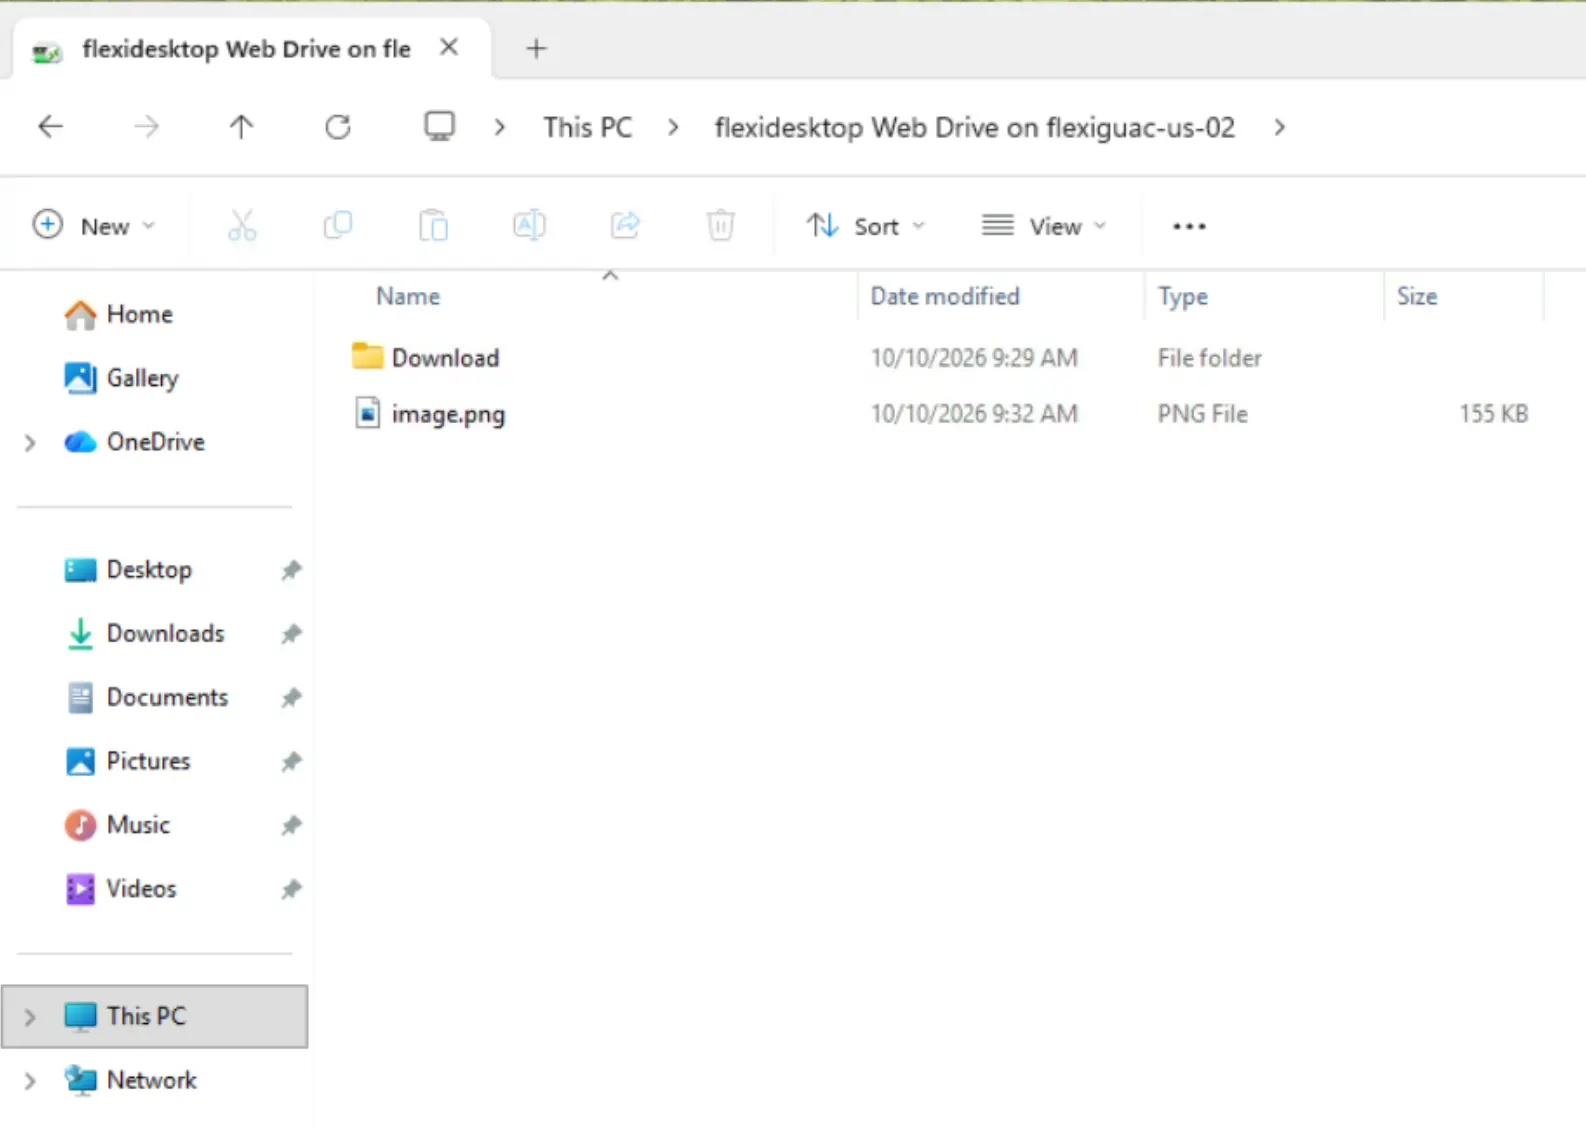
Getting a file out of your flexidesktop and onto your physical computer is just as simple, and it works in reverse through the same Download folder.
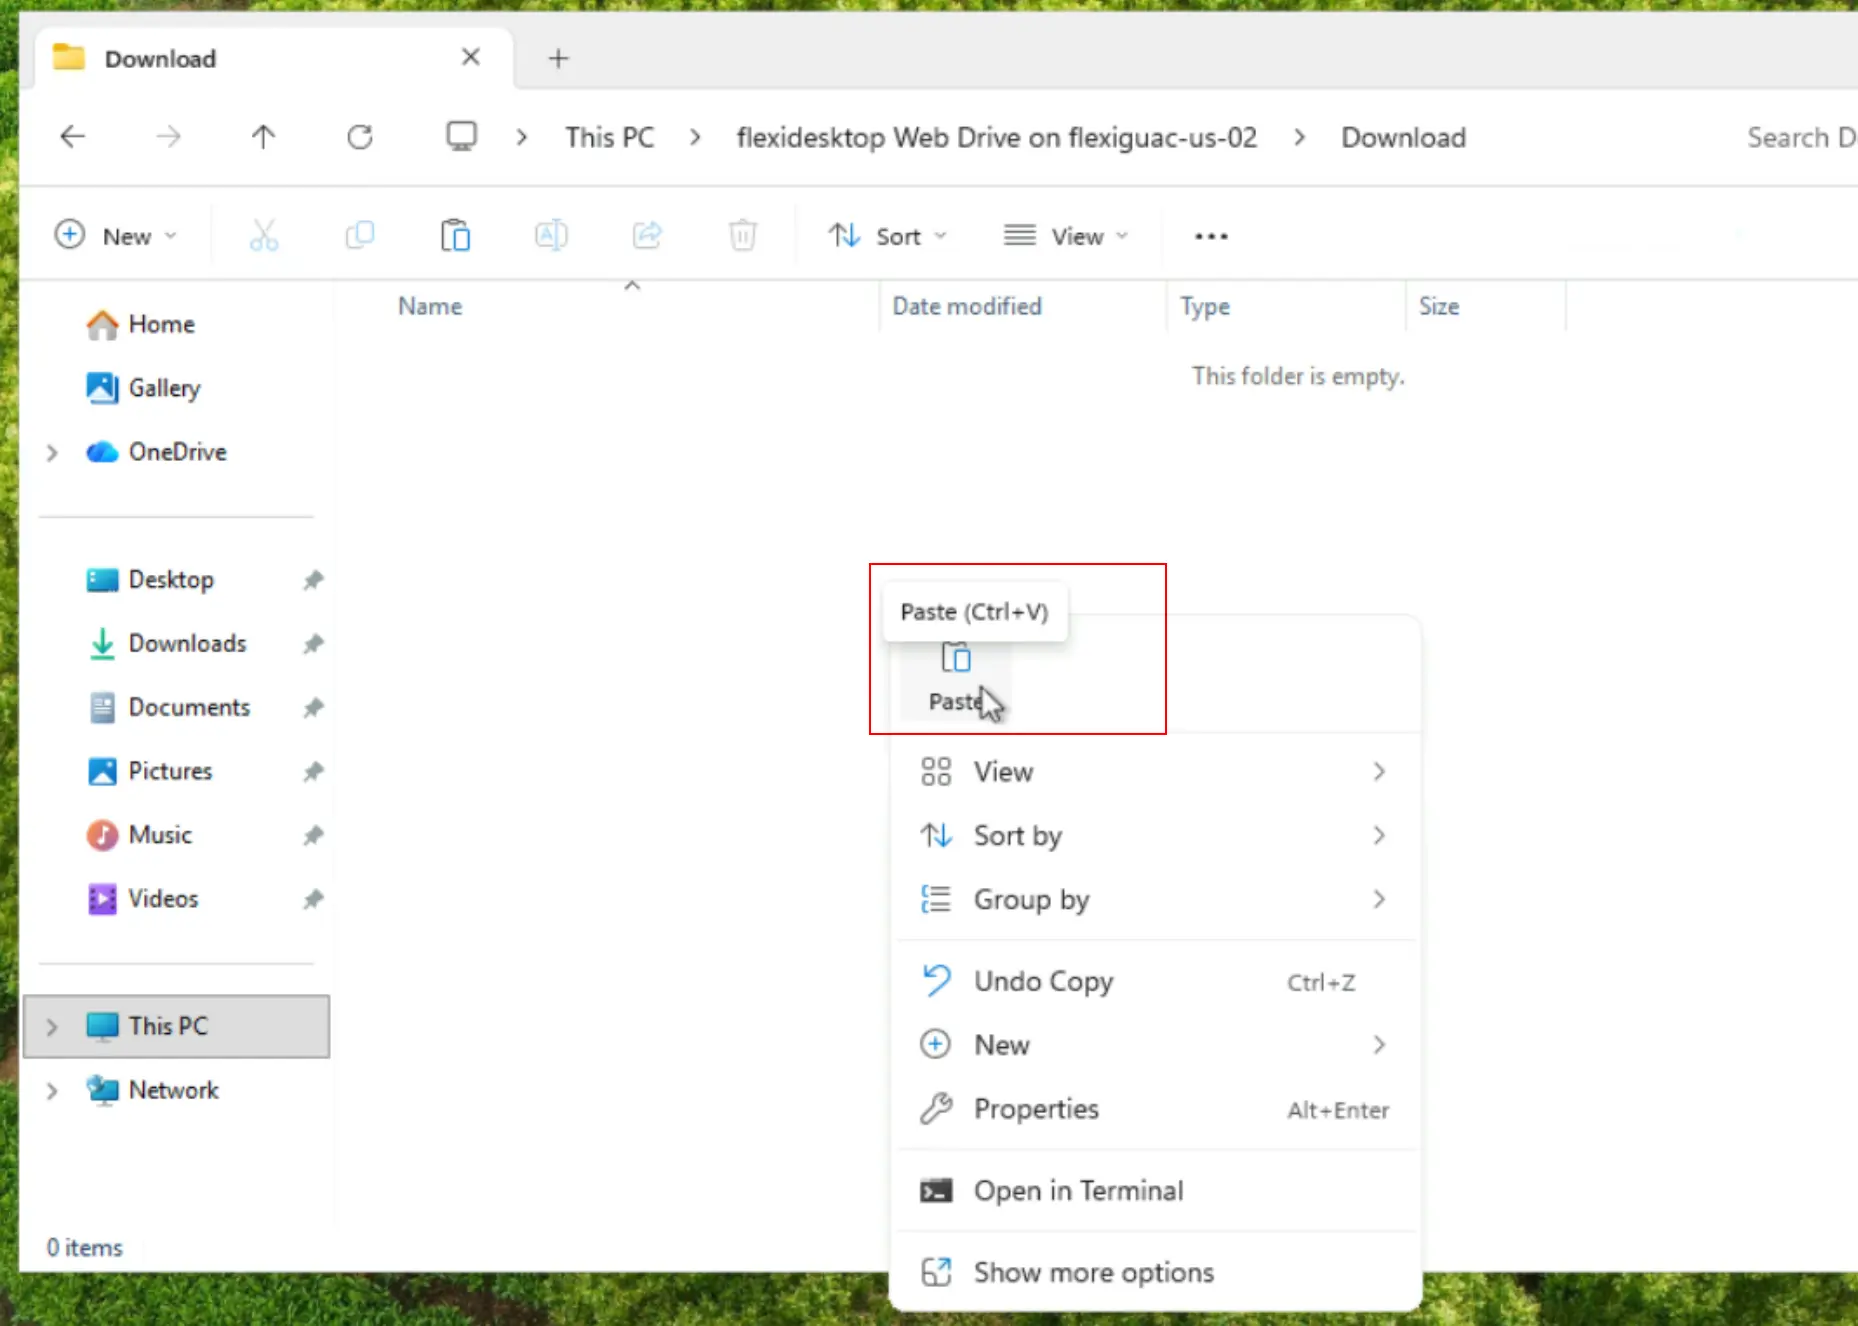
You’ll find the downloaded file in your physical computer’s usual Downloads folder, just like any other browser download.
| Direction | What to do |
|---|---|
| PC → Cloud PC | Shared Drive panel → Upload Files → select file → find it in This PC → flexidesktop Web Drive |
| Cloud PC → PC | Copy/paste the file into This PC → flexidesktop Web Drive → Download → it downloads to your browser automatically |
Haven’t tried flexidesktop yet?
Get a full Windows 11 cloud PC running in your browser in minutes — no installs, no VPN, no RDP client. Move files in and out with just drag, upload, and paste.
Try a cloud PC free →No. The Shared Drive panel described in this guide is a feature of the web client. If you connect to your flexidesktop using a Remote Desktop (RDP) client instead of the browser, file transfer is handled differently, through RDP’s own drive redirection settings.
The Shared Drive has a 2 GB storage quota. It’s designed for everyday files like documents, images, and small archives — not as permanent storage. If you need to move very large files, or move files regularly, consider using a cloud storage service (such as OneDrive, which is available on your cloud PC) for a more robust transfer.
Yes. When you click Upload Files, your browser’s file picker allows you to select multiple files at once. Each one will appear individually under FILE TRANSFERS as it uploads.
The Download folder inside the flexidesktop Web Drive is the designated “exit point” for files leaving your cloud PC. Any file placed there is automatically pushed to your browser’s download system on your physical computer. Files placed elsewhere in the Web Drive stay available for upload purposes but won’t trigger a download to your device.
If you run into any issues transferring files, open a ticket from your client dashboard and our support team will help you out.
Learn how to create an administrator account in Windows using Computer Management or Command Line. Step-by-step instructions included!

Learn how to extend your C: drive in Windows 10, Windows 11, and Windows Server 2025 — including fixing recovery partition issues. flexidesktop users can instantly upgrade storage and expand OS partitions with just a few clicks.



