
How to Connect to a Remote Desktop Using a VPN: Step-by-Step Guide
Learn how to connect to your remote desktop securely using a VPN. Follow our simple steps to get started with flexidesktop today!
Explore Windows 10/11 virtual desktops
Real-World Applications of flexidesktop
Welcome to your new flexidesktop Team! In this guide, we’ll walk you through the process of accessing your flexidesktop Team desktop and managing users, so you can get started quickly and easily.
If you haven’t purchased a flexidesktop Team yet, you can explore our plans here.
Once your order is complete, you’ll receive a confirmation email.
To access your flexidesktop Team, follow these steps:
You can easily reset it at any time by visiting this link.
In the My Desktops section, scroll down to the Team Desktops area.

On the Details page, you’ll find the information for the first user that was created automatically for your Team desktop.
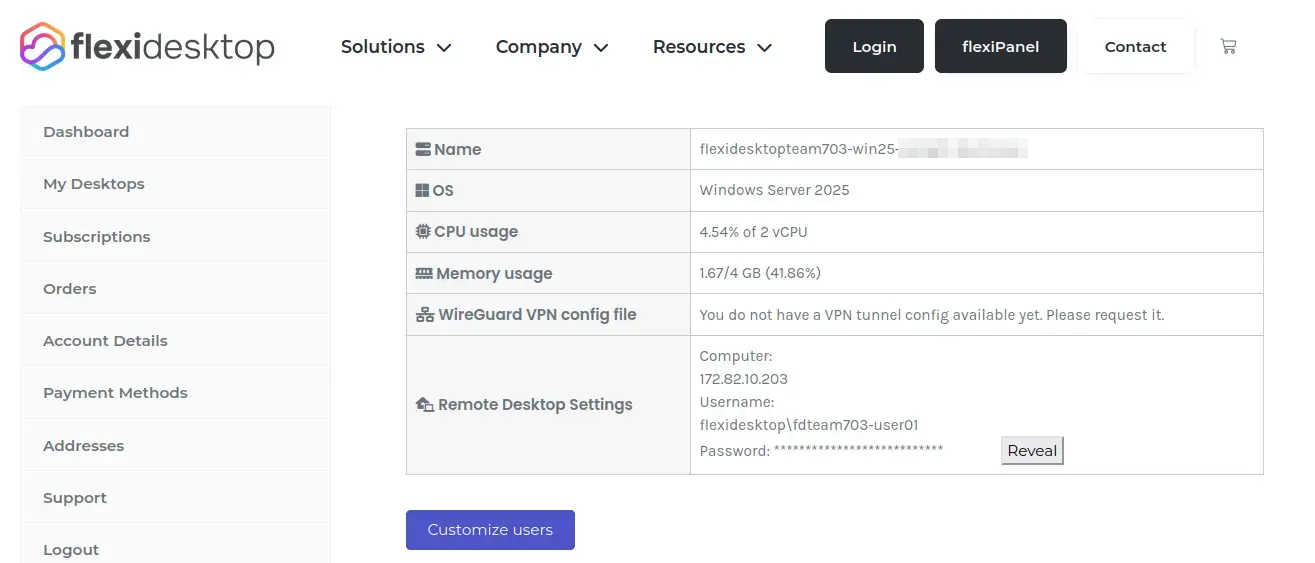
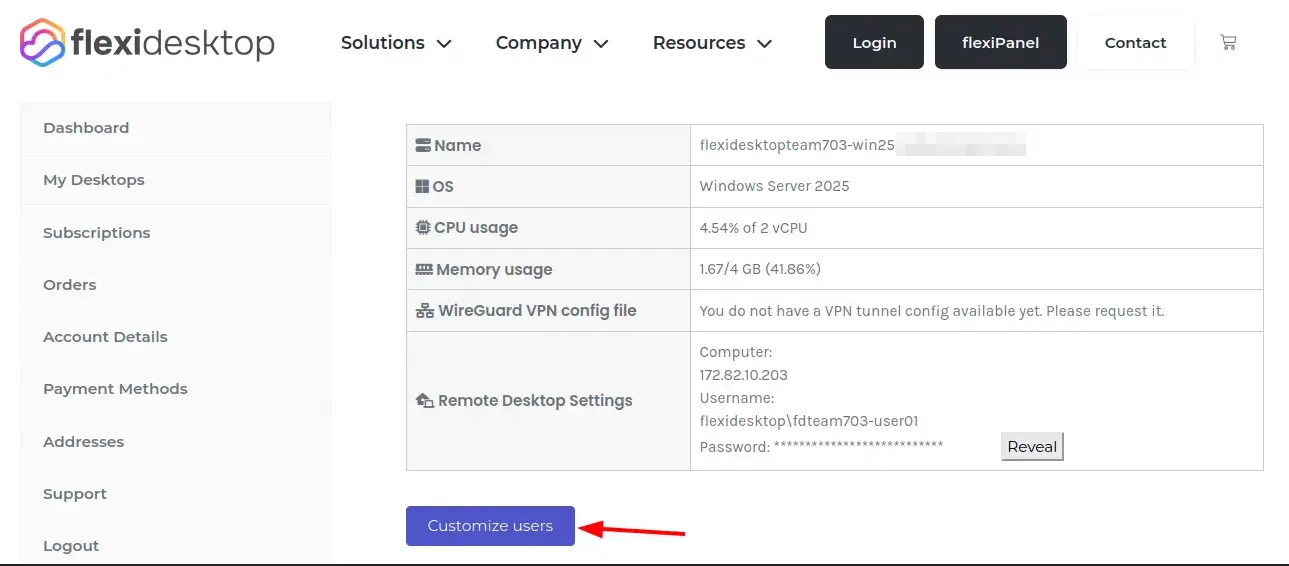
Below the Remote Desktop Settings section, you’ll find a button labeled “Customize users”.
Click on “Customize users” to open the user management form.
Here, you can request changes such as:
Just fill out the form with the details for each user:
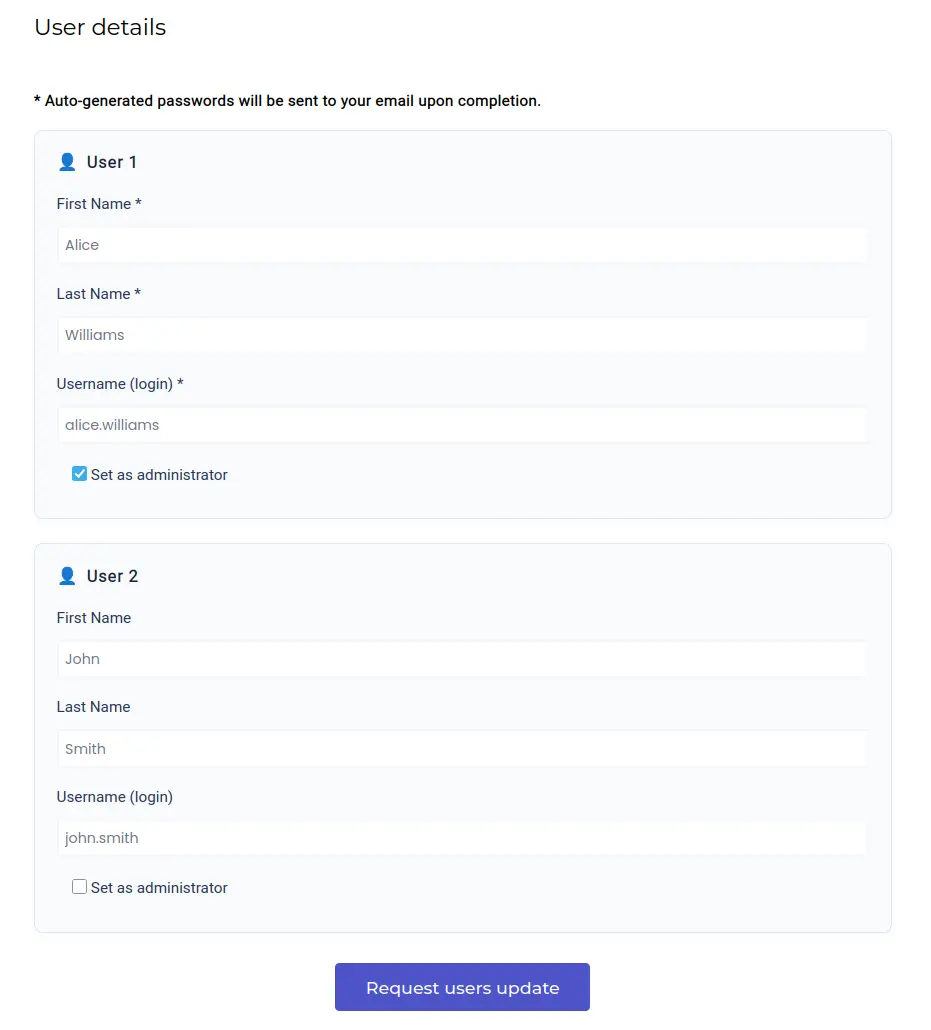
Once you’ve submitted the form, our technical team will review your request and make the necessary changes. You’ll receive an email notification as soon as everything is ready.
You have two easy ways to access your flexidesktop Team:
The simplest way to get started is to use your web browser.
As soon as your order is confirmed, we send you an email with your web login credentials.
Depending on your selected datacenter, use the appropriate login page:
Your username and password for the web login are included in the same email you received after completing your order.
Simply visit the login page, enter your credentials, and you’ll have instant access to your virtual desktop—no extra software required.
If you prefer not to use the web browser, you can also connect to your flexidesktop Team using a VPN together with the Microsoft Remote Desktop client. This alternative method provides a smoother user experience and improved performance—especially recommended for longer work sessions or when you need maximum responsiveness. To get started, simply follow our step-by-step VPN setup guide:
How to Connect to Remote Desktop via VPN →
This method is ideal if you need access to internal company resources or want an additional security layer for your connection.
For quick tasks and short sessions, accessing your flexidesktop Team via web browser is the fastest and easiest method.
For regular daily use or longer sessions, we recommend connecting through VPN + Remote Desktop client for the best experience.
Q: Can I manage users directly from Windows?
A: All user management (creation, deletion, administrator rights) is handled by the flexidesktop team for security and reliability. Just use the Customize users form and we’ll take care of everything.
Q: How long does it take to process user changes?
A: Most requests are processed within a few hours during business days. You’ll get an email as soon as your users are ready.
If you have any questions or need assistance, feel free to contact our support team. We’re happy to help!

Learn how to connect to your remote desktop securely using a VPN. Follow our simple steps to get started with flexidesktop today!

Welcome to your new flexidesktop! With your personal flexidesktop, you can securely access a Windows 10/11 environment from anywhere using

