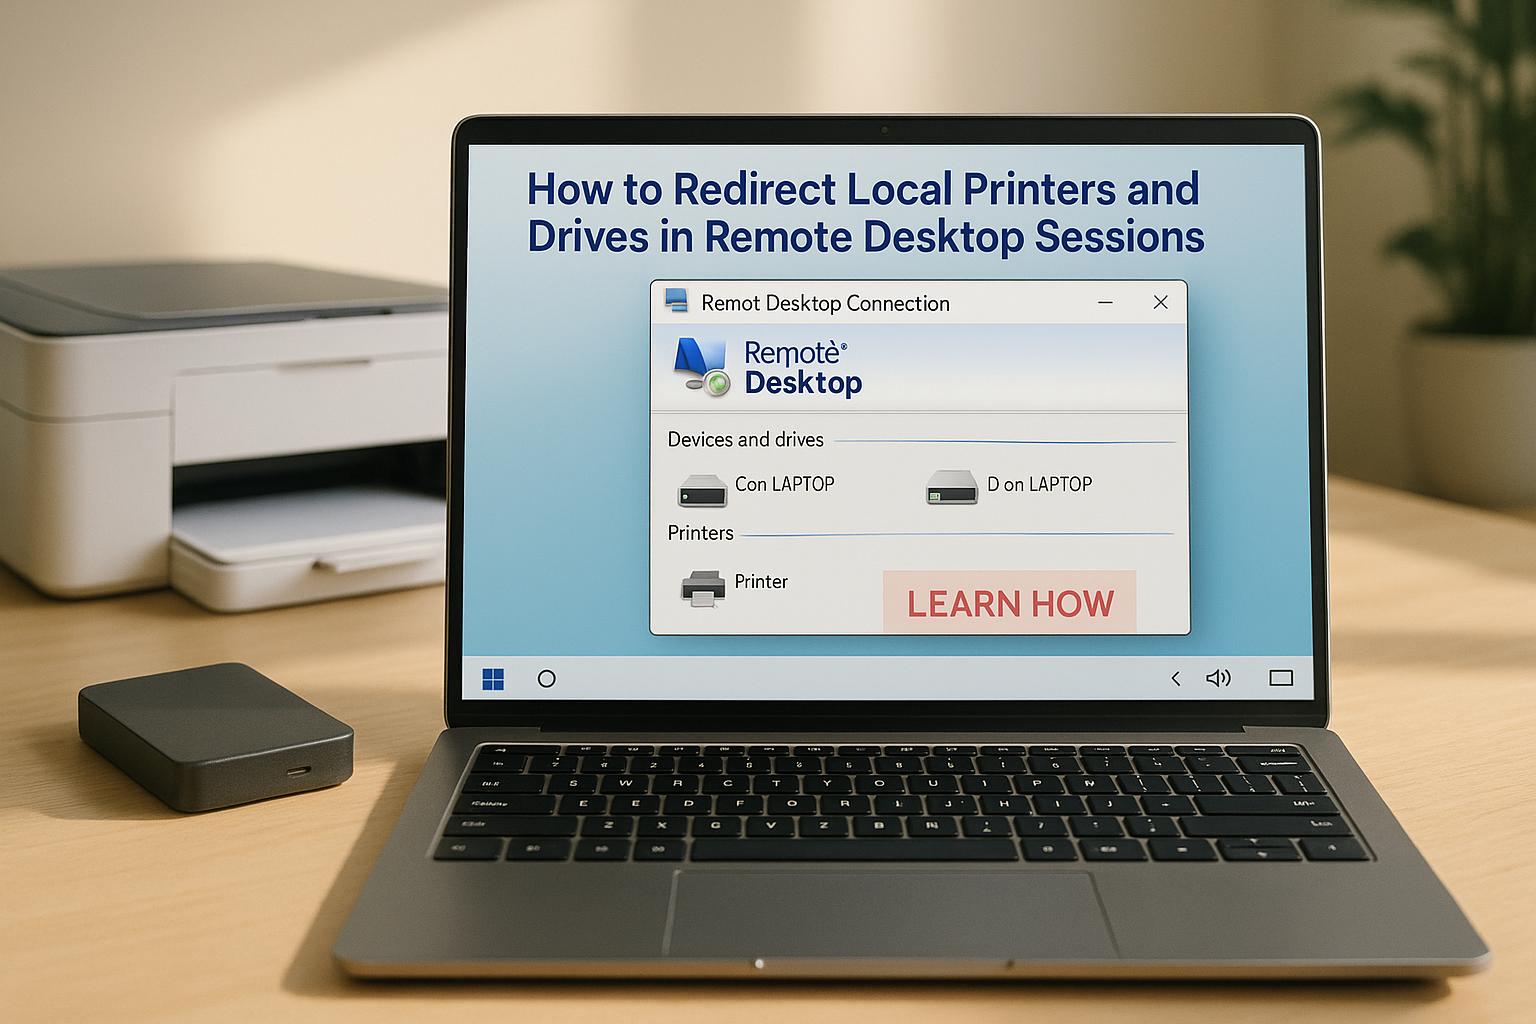
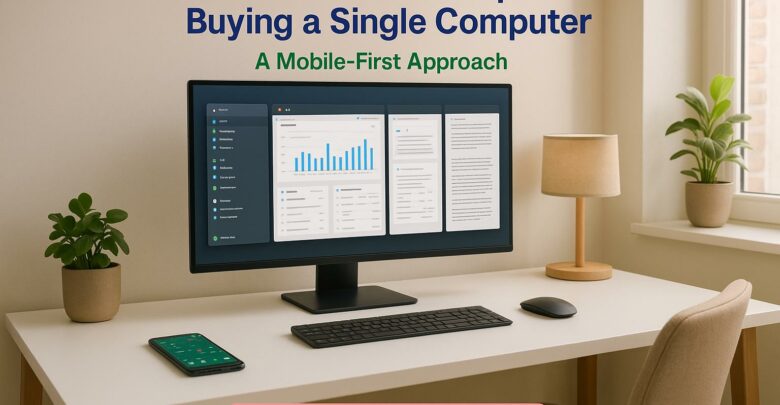
Learn how to effectively redirect local printers and drives during Remote Desktop sessions for enhanced productivity and seamless remote work.
Redirecting local printers and drives during Remote Desktop sessions is essential for smooth remote work. It allows you to print to your home printer or access files on your local drives directly from a remote session. Here’s how it works:
Printer Redirection: Uses Microsoft’s Easy Print feature to simplify printing. No need for server-side drivers; print jobs are sent to your local system for processing.
Drive Redirection: Maps local drives to the remote session using RDP’s virtual channels, enabling file access and transfers.
Setup Steps:
For Printers:
In the Remote Desktop Connection client, enable printer redirection under "Local Resources."
Adjust Group Policy to allow printer redirection if needed.
Check for redirected printers in the remote session under "Devices and Printers."
For Drives:
Select specific drives to redirect in the Remote Desktop client.
Update Group Policy settings to permit drive redirection.
Troubleshooting:
Printer issues? Check Easy Print drivers or install manufacturer-specific drivers.
Drive problems? Verify permissions, network stability, and antivirus settings.
Performance Tip: Redirect only necessary devices to reduce bandwidth usage.
For a hassle-free alternative, services like flexidesktop simplify local device integration with pre-configured settings and enhanced security, starting at $19/month.
Add Local Drives and Printers to Remote Desktop Connection
How Printer and Drive Redirection Works in Remote Desktop
Grasping the technical workings of RDP redirection is key for IT administrators aiming to resolve issues and fine-tune performance. Remote Desktop Protocol (RDP) uses two main methods to connect local devices to remote sessions: Easy Print for printers and virtual channels for drives and other peripherals.
When an RDP session begins, the client informs the server about available local devices. The server then creates virtual versions of these devices within the remote session.
Each redirected device adds data streams – whether for printing, file transfers, or device interactions – that can affect responsiveness, especially on limited bandwidth. This interaction forms the basis for understanding how Easy Print and virtual channels make redirection work smoothly.
Printer Redirection: How Easy Print Simplifies the Process
Easy Print transformed printer redirection when Microsoft introduced it with Windows Server 2008. Before this, administrators had to install and manage printer drivers for every possible printer model on terminal servers – a time-consuming and error-prone process.
Easy Print acts as a universal tool by capturing print jobs from the remote server, converting them into Enhanced Metafile (EMF) format, and sending them to the client’s local print system for final processing.
This eliminates the need for server-side printer drivers. Whether it’s a basic home printer, a high-end office laser printer, or a specialized label printer, Easy Print handles them all the same way. The server doesn’t need to know the specific capabilities of each printer or install its drivers.
Another advantage of Easy Print is how it manages print queues. If a local printer goes offline or runs out of paper, the print job stays in the local queue instead of causing issues on the server. This prevents server-side spooler errors that might disrupt other users.
While Easy Print streamlines printer redirection, drive mapping achieves similar efficiency through virtual channels.
Drive Mapping: The Role of Virtual Channels
Drive redirection relies on RDP’s virtual channel architecture, which creates separate communication paths between the client and server. Each redirected drive is assigned its own virtual channel, allowing multiple file operations to run simultaneously.
When drive redirection is enabled, the RDP server generates drive mappings that appear in the remote session as network drives. These are labeled with names like "C on CLIENT" or "USB Drive on CLIENT", clearly identifying them as redirected resources.
The file system redirection occurs at the I/O level. For example, if an application in the remote session tries to access a redirected drive, the server intercepts the request and sends it through the virtual channel to the client. The client processes the request using its local file system and sends the results back to the server.
USB drive redirection works similarly but involves additional complexity. When a USB device is plugged into the client machine, it’s automatically redirected to the remote session, providing instant access without requiring manual setup.
Security measures are built into drive redirection at various levels. Group Policy settings can control which drives can be redirected, whether users can write to them, or even block specific file types. Additionally, the RDP client adheres to local file permissions, ensuring users can’t access files they wouldn’t be able to access locally.
Performance considerations are especially important with drive redirection. Transferring large files can strain the RDP connection, affecting the session’s responsiveness. To address this, modern RDP implementations use caching and compression to reduce bandwidth usage. Frequently accessed files may also be cached on the server to avoid repeated transfers.
Virtual channels enable two-way communication, allowing server applications to check drive properties and receive updates on drive status in real time. This ensures redirected drives behave like local ones, maintaining a seamless experience while optimizing data flow and preserving session stability and security.
Step-by-Step Guide: Setting Up Printer and Drive Redirection in RDP
To make the most of Remote Desktop Protocol (RDP), it’s crucial to configure printer and drive redirection properly. Here’s a straightforward guide to help you set up both features on the client and server sides.
Setting Up Printer Redirection
Printer redirection ensures that local printers are accessible during a remote session. Start by adjusting the settings in the Remote Desktop Connection client.
Configuring the Client for Printer Redirection
Launch the Remote Desktop Connection client by pressing Win+R, typing mstsc, and hitting Enter.
In the Remote Desktop Connection window, click Show Options to expand the available settings.
Go to the Local Resources tab. Under "Local devices and resources", check the box for Printers. This will redirect all local printers and make the default printer available in the remote session.
To customize which local devices are redirected, click More… and select additional options.
Save your preferences for future sessions by navigating to the General tab and clicking Save.
Confirming Printer Access
Once connected to the remote desktop, open the Control Panel and go to Devices and Printers. Your local printers should appear, managed by the Remote Desktop Easy Print driver.
Group Policy Adjustments for Printer Redirection
To ensure printer redirection works smoothly, you may need to adjust Group Policy settings:
Open the Group Policy Editor (type gpedit.msc in the Run dialog).
Disable the policy labeled Do not allow client printer redirection. This ensures local printers are redirected during remote sessions.
With printers set up, you can move on to configuring drive redirection.
Setting Up Drive Redirection
Drive redirection allows you to access local storage devices, such as fixed drives, USB drives, or network shares, from within your remote session.
Configuring the Client for Drive Redirection
Open the Remote Desktop Connection client and click Show Options to access advanced settings.
Navigate to the Local Resources tab and find the "Local devices and resources" section.
Click More… and expand the Drives category. Select the specific drives you want to make accessible during the remote session. Unlike printer redirection, this feature lets you choose individual drives, so only select the ones you need for security purposes.
Adjusting Group Policy for Drive Redirection
To ensure drive redirection is enabled on the server side, follow these steps:
Open the Group Policy Management Console or the Local Group Policy Editor (gpedit.msc).
Create or modify a Group Policy Object (GPO) targeting Remote Desktop Session Host servers.
Navigate to: Computer Configuration > Administrative Templates > Windows Components > Remote Desktop Services > Remote Desktop Session Host > Device and Resource Redirection.
Set the policy Do not allow drive redirection to Disabled. This allows local drives to be accessed remotely and enables file transfers between the local and remote systems.
sbb-itb-bea6502
Troubleshooting: Fixing Common Issues in RDP Redirection
Even with everything set up correctly, printer and drive redirection in Remote Desktop sessions can still hit a few bumps. Common culprits include driver conflicts, Group Policy settings, or network issues. Tackling these problems ensures a smoother remote experience.
Fixing Printer Redirection Issues
If your printers aren’t showing up during a remote session, the problem might lie with the Easy Print driver or the client-side setup. Start by checking that Remote Desktop Services on your server are running and configured correctly.
For specialized printers, driver conflicts are a frequent issue. In such cases, you may need to install the printer manufacturer’s drivers directly on the server. To do this, open the server’s Device Manager, find the redirected printer, and update its driver using the manufacturer’s version instead of relying solely on Easy Print.
If the problem persists, double-check your configuration settings. As a last resort, you can inspect the registry, but only if all other fixes fail.
Once printer issues are resolved, it’s time to tackle drive redirection problems to ensure full remote functionality.
Fixing Drive Redirection Problems
Drive redirection issues often manifest as missing drives in File Explorer or access denied errors when attempting to open redirected drives. Start by confirming that drive redirection is enabled in both your RDP client settings and the server’s Group Policy configurations.
Sometimes, permission conflicts can block access to redirected drives. Windows may treat these drives as removable media, applying extra security restrictions. To resolve this, open secpol.msc on the server, navigate to Local Policies > User Rights Assignment, and make sure the Remote Desktop Users group is included in the Allow log on through Remote Desktop Services policy.
Antivirus software can also interfere, blocking file system operations on redirected drives. If you suspect antivirus is the issue, try temporarily disabling it for testing or adjust its settings to exclude RDP processes or redirected drive paths.
Network stability plays a big role in drive availability. Check your network settings and tweak RDP keep-alive or timeout parameters to maintain a stable connection.
Addressing these issues not only restores access to redirected drives but also enhances both performance and security.
Performance and Security Considerations
Redirecting multiple drives or large storage devices can eat up bandwidth, as file operations generate significant network traffic between the client and server. Monitor network usage during file transfers and limit redirection to essential drives where possible.
In some cases, enterprise security policies may block drive redirection to prevent unauthorized data transfers. If Group Policy settings are causing the issue, review them under Computer Configuration > Administrative Templates > Windows Components > Remote Desktop Services > Remote Desktop Session Host > Device and Resource Redirection.
Finally, double-check firewall settings (specifically TCP port 3389) and antivirus exclusions to ensure they’re not interfering with RDP redirection. If problems persist, review session timeout settings and firewall rules for additional clues.
These adjustments help optimize both performance and security, ensuring seamless access to remote resources.
Flexidesktop takes the hassle out of device redirection, offering a straightforward solution to a common problem. Unlike traditional RDP setups that often require manual configuration, flexidesktop provides a managed Windows virtual desktop with seamless local device integration built right in.
Pre-Configured Device Redirection
With flexidesktop, local device integration is already taken care of. Whether it’s printers, drives, or other peripherals, the service is designed to connect them effortlessly. This managed approach means IT teams can quickly integrate devices, saving time and reducing headaches. Plus, it works across various devices – whether you’re using a Windows laptop, Mac, or tablet.
By eliminating the configuration struggles that come with traditional RDP setups, flexidesktop lets users focus on their work instead of troubleshooting. The pre-configured setup significantly cuts down on time spent getting things up and running.
Secure and Simple Integration
Flexidesktop doesn’t just make integration simple – it also makes it secure. It includes built-in VPN access to ensure encrypted data transfers between local devices and the virtual desktop during remote sessions. Additionally, by operating within a private, isolated network, flexidesktop reduces the risks tied to complicated firewall settings and port forwarding. This combination of simplicity and security ensures a smooth and safe user experience.
Conclusion: Simplify Remote Work with flexidesktop
Configuring printer and drive redirection in traditional RDP setups often involves complex settings and troubleshooting. While these methods can get the job done, they require a lot of time from IT teams and can lead to ongoing maintenance headaches.
This is where flexidesktop steps in, eliminating the need for tedious GPO configurations and driver issues. Instead, it provides a managed virtual desktop that automatically integrates local devices. By handling the technical complexities behind the scenes, flexidesktop allows IT teams to focus on more strategic priorities rather than spending hours on setup and maintenance.
Starting at just $19 per month for the basic plan, flexidesktop is a cost-effective alternative to traditional RDP setups, saving time and reducing labor costs. With an impressive rating of 4.8 stars from over 386 reviews [1], it has proven to be a reliable solution for businesses across various industries. Beyond affordability, flexidesktop also delivers strong security measures and excellent performance, as highlighted earlier.
For businesses managing remote teams, flexidesktop offers the flexibility to work seamlessly across devices – whether it’s Windows laptops, Macs, or tablets. The platform ensures a smooth and consistent experience for all users, regardless of their device.
Security is another area where flexidesktop shines. With built-in VPN access and advanced encryption protocols, it safeguards data during transmission, addressing the common vulnerabilities found in traditional RDP setups.
If you’re ready to move past the limitations of conventional remote desktop solutions, flexidesktop provides a hassle-free, efficient alternative. It simplifies remote work by automating local device integration, freeing up IT resources, and enhancing user productivity. With flexidesktop, your team can enjoy a streamlined, secure, and productive remote working experience.
FAQs
What are the common problems with printer and drive redirection in Remote Desktop, and how can you fix them?
Printer and drive redirection in Remote Desktop can sometimes run into frustrating issues. Common problems include printers not showing up, print jobs failing or disappearing, garbled print output, or delays during printing. These hiccups often stem from outdated or incompatible drivers, incorrect Remote Desktop settings, or misconfigured Group Policy.
To tackle these issues, start by updating printer drivers on both the client and server. Make sure printer and drive redirection options are enabled in the Remote Desktop client settings. If issues persist, double-check Group Policy configurations. Restarting the print spooler service or tweaking printer settings might also do the trick. In more persistent cases, try renaming the client workstation or testing with a different client device to identify the root cause.
What is Microsoft’s Easy Print feature, and how does it improve printer redirection in Remote Desktop sessions?
Microsoft’s Easy Print feature streamlines the process of printer redirection during Remote Desktop (RDP) sessions by using a universal driver. This approach removes the hassle of installing individual printer drivers on the remote server, which is especially helpful in environments with a variety of printer models. Instead, print jobs are sent to the user’s local machine for processing, keeping things simple and efficient.
Some standout advantages of Easy Print include broad compatibility with different printers, less administrative effort, and a smooth user experience. Additionally, it lets users access their local printer settings directly within the remote session, making the workflow more straightforward and user-friendly.
What are the key security tips for enabling drive redirection in Remote Desktop sessions?
Drive redirection in Remote Desktop Protocol (RDP) sessions can be handy, but it also comes with potential security concerns. To keep your systems secure, here are some practical tips:
Turn off drive redirection unless absolutely necessary to reduce the risk of exposing sensitive files.
Implement strong authentication methods, like multi-factor authentication (MFA), to block unauthorized access.
Limit user permissions by granting RDP access only to those who genuinely need it.
Protect your network by restricting RDP traffic to trusted IP addresses and using firewalls effectively.
Enable session logging and review logs regularly to catch any unusual activity.
Pairing these steps with consistent system updates and well-thought-out configurations can help you use drive redirection securely while keeping risks at a minimum.
Explore how GPU-accelerated virtual desktops are revolutionizing architecture firms by enhancing collaboration, reducing costs, and improving rendering efficiency.
To provide the best experiences, we use technologies like cookies to store and/or access device information. Consenting to these technologies will allow us to process data such as browsing behavior or unique IDs on this site. Not consenting or withdrawing consent, may adversely affect certain features and functions.
Functional
Always active
The technical storage or access is strictly necessary for the legitimate purpose of enabling the use of a specific service explicitly requested by the subscriber or user, or for the sole purpose of carrying out the transmission of a communication over an electronic communications network.
Preferences
The technical storage or access is necessary for the legitimate purpose of storing preferences that are not requested by the subscriber or user.
Statistics
The technical storage or access that is used exclusively for statistical purposes.The technical storage or access that is used exclusively for anonymous statistical purposes. Without a subpoena, voluntary compliance on the part of your Internet Service Provider, or additional records from a third party, information stored or retrieved for this purpose alone cannot usually be used to identify you.
Marketing
The technical storage or access is required to create user profiles to send advertising, or to track the user on a website or across several websites for similar marketing purposes.