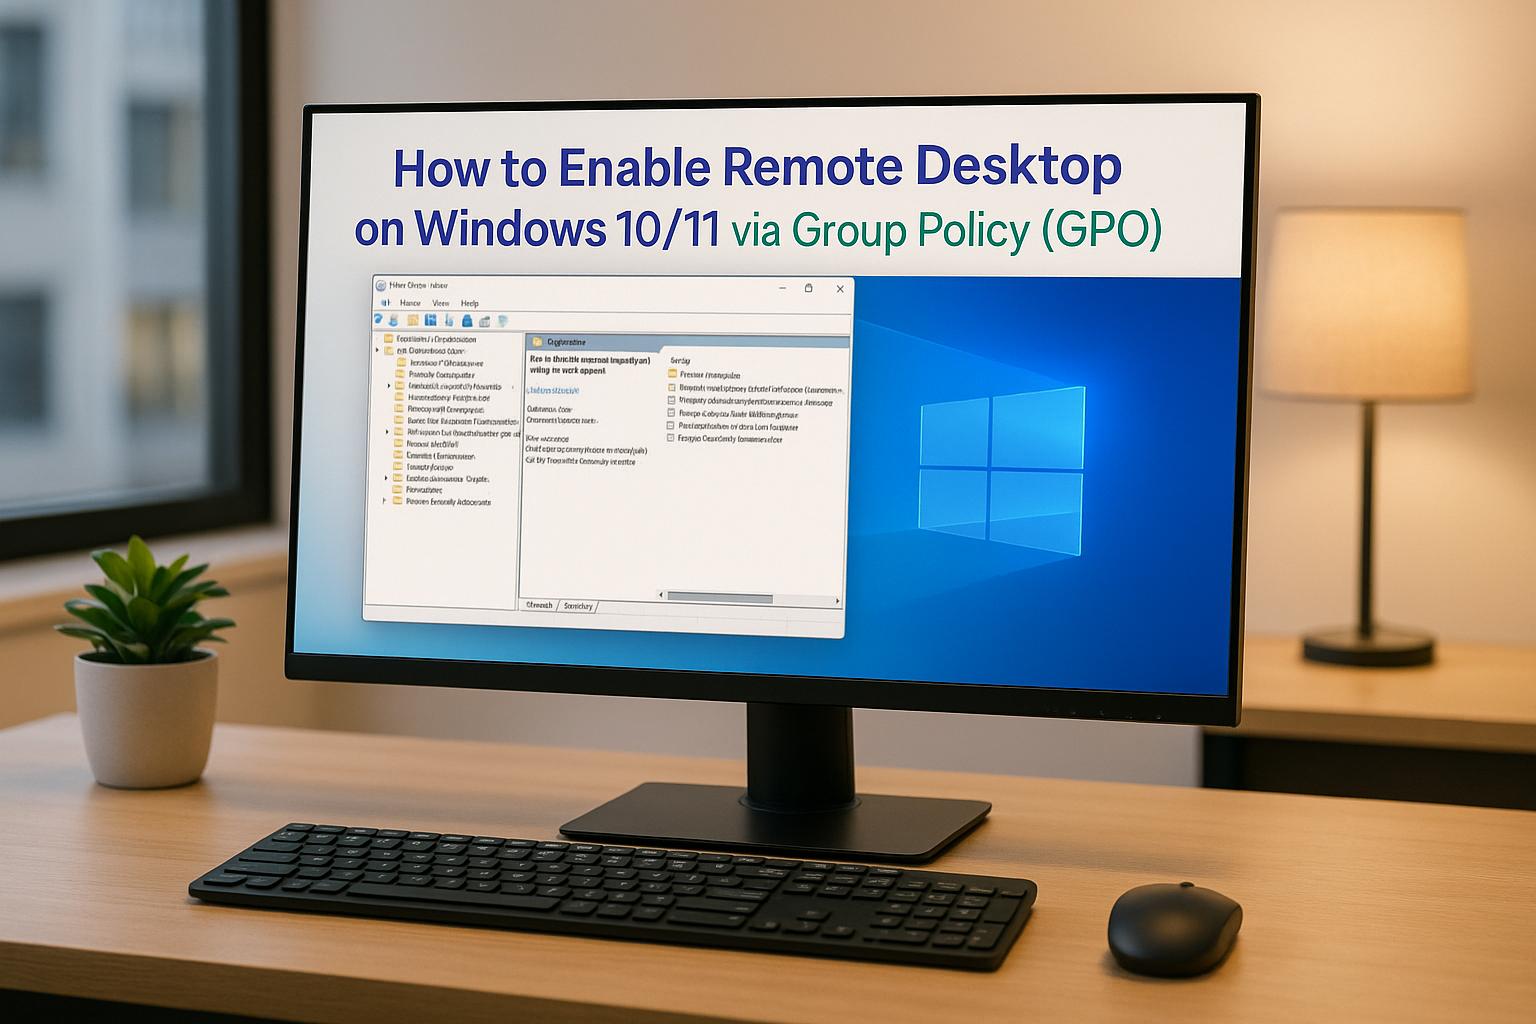
Learn how to centrally enable Remote Desktop on Windows 10/11 using Group Policy for efficient management and enhanced security.
Enabling Remote Desktop on multiple Windows 10/11 devices is easier with Group Policy (GPO). Instead of configuring each computer manually, you can use GPO to manage settings centrally for all domain-joined machines. This guide explains how to enable Remote Desktop, configure security, and manage user access efficiently.
Enable “Allow users to connect remotely by using Remote Desktop Services”.
Enhance Security:
Enable Network Level Authentication (NLA) to require credentials before connecting.
Configure firewall rules to allow traffic on port 3389.
Grant User Access:
Add users to the Remote Desktop Users group using GPO Restricted Groups for centralized control.
Apply and Test Policies:
Link the GPO to the correct OU.
Force a Group Policy update (gpupdate /force) and test Remote Desktop functionality.
Why Use GPO?
GPO saves time by automating Remote Desktop configurations across multiple devices, ensures consistent settings, and simplifies user access management. For larger networks, it’s an efficient way to maintain control and security.
By following these steps, IT administrators can streamline Remote Desktop setup and management while ensuring secure access for users.
How to Enable Remote Desktop via GPO in Opening and Setting Up Group Policy Management Console
If you’re looking to streamline Remote Desktop configurations across multiple machines, the Group Policy Management Console (GPMC) is your go-to tool. Unlike the local Group Policy editor, which only affects individual computers, GPMC allows you to manage policies centrally and deploy them across all domain-joined devices.
How to Open Group Policy Management Console
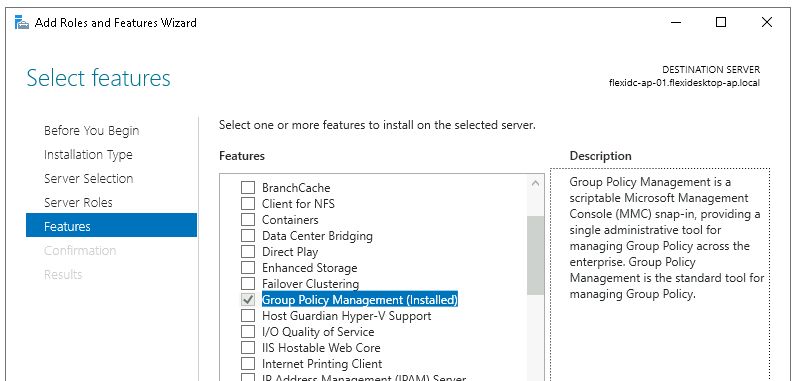
First, ensure that GPMC is installed on your Windows 10 or 11 system. You can install it as part of the Remote Server Administration Tools (RSAT). Use PowerShell to install it by running this command:
Alternatively, navigate to Server Manager > Add Roles and Features > Features and add it manually.
Launching GPMC:
Once installed, accessing GPMC is simple:
Press Windows + R, type gpmc.msc, and hit Enter.
Or, click Start, type “Group Policy Management” or “GPMC”, and select it from the search results.
Keep in mind that your computer must be joined to an Active Directory domain. Additionally, you’ll need to log in with a domain user account that has the necessary permissions to manage Group Policy Objects (GPOs). Typically, this means being a member of the Domain Admins group or having specific GPO management rights.
Creating or Choosing a GPO for Remote Desktop
Once you’ve opened GPMC, you’ll see your domain hierarchy displayed as a tree. To manage Remote Desktop settings effectively, it’s best to create a dedicated Group Policy Object (GPO) and link it to the Organizational Unit (OU) where your target computers reside.
Steps to Create a New GPO:
Right-click the OU where you want to apply the policy.
Select Create a GPO in this domain, and Link it here…
Give the GPO a descriptive name, such as “Enable Remote Desktop.”
This newly created GPO will allow you to configure and enforce Remote Desktop settings across all the computers in the selected OU. With your GPO ready and linked, you can now move on to defining the specific Remote Desktop configurations within the policy.
Setting Up Group Policy to Turn On Remote Desktop
With your Group Policy Object (GPO) created and linked, the next step is to configure the settings for Remote Desktop. This involves enabling remote connections, tightening security, and ensuring the firewall allows the necessary traffic. These steps are crucial for secure and functional Remote Desktop access.
Finding the Remote Desktop Policy Settings
To locate the Remote Desktop settings in Group Policy, right-click the GPO and select Edit to open the Group Policy Management Editor.
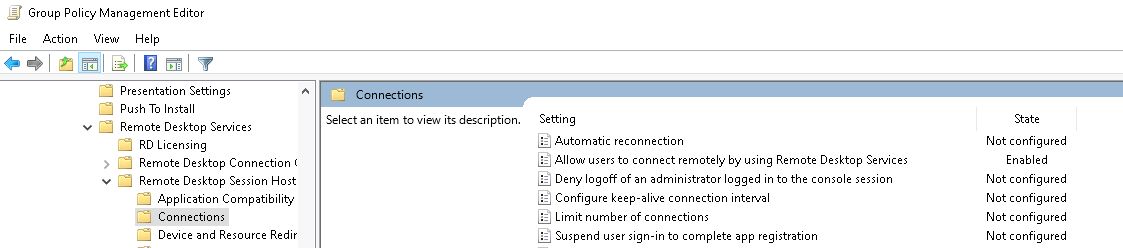
From here, follow this path: Computer Configuration → Policies → Administrative Templates → Windows Components → Remote Desktop Services → Remote Desktop Session Host → Connections
Within this section, you’ll find the main policy that controls Remote Desktop connections: “Allow users to connect remotely by using Remote Desktop Services.”
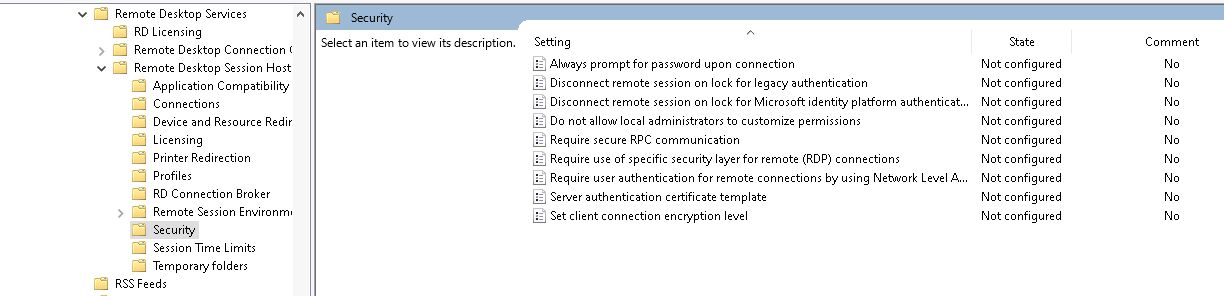
For additional security settings, such as Network Level Authentication, navigate to: Computer Configuration → Policies → Administrative Templates → Windows Components → Remote Desktop Services → Remote Desktop Session Host → Security.
This area contains policies to enhance security, requiring authentication before a full Remote Desktop session begins.
Turning On Remote Desktop Settings
To enable Remote Desktop, double-click the “Allow users to connect remotely by using Remote Desktop Services” policy. In the configuration window, set the policy to “Enabled.” This activates the Remote Desktop service, allowing remote connections to the computers in your domain.
For added security, configure Network Level Authentication. Under the Security folder mentioned earlier, double-click “Require user authentication for remote connections by using Network Level Authentication” and set it to “Enabled.” This ensures that only users with valid credentials can initiate Remote Desktop sessions, protecting your systems from unauthorized access.
Finally, ensure the Windows Firewall is set to allow Remote Desktop traffic. Without proper firewall configuration, even enabled Remote Desktop settings won’t work.
Setting Up Windows Firewall Rules for Remote Desktop
Enabling Remote Desktop through Group Policy is just one part of the process. You also need to configure the Windows Firewall to allow traffic on port 3389, which is the default port for Remote Desktop Protocol (RDP) connections.
Here are two ways to configure the firewall:
Create a custom inbound rule for TCP port 3389:
Navigate to: Computer Configuration → Policies → Windows Settings → Security Settings →Windows Defender Firewallwith Advanced Security → Inbound Rules
Right-click Inbound Rules and select New Rule.
Choose Port as the rule type, select the TCP protocol, and specify port 3389.
Choose Allow the connection and, for better security, restrict the rule to Domain and Private Profiles.
Enable the predefined firewall exception for domain profiles:
Properly configuring the firewall is essential. Even if Remote Desktop is enabled in Group Policy, connections will fail if traffic on port 3389 is blocked. Taking these steps ensures smooth and secure Remote Desktop functionality.
Giving Users Access to Remote Desktop
Once you’ve set up the Remote Desktop settings and configured firewall rules, the next step is granting user access to complete the setup. While enabling Remote Desktop through Group Policy (GPO) lays the groundwork, it doesn’t automatically allow all users access. By default, only members of the Administrators group can connect remotely to Windows computers [3][4]. To let other users connect, you’ll need to explicitly grant them permission. One efficient way to manage this is by using GPO Restricted Groups to automate the process.
Adding Users to the Remote Desktop Users Group
The Remote Desktop Users group is key to granting Remote Desktop Protocol (RDP) access. To streamline this process across your domain, you can use GPO Restricted Groups.
Here’s how to configure it:
Open your Group Policy Object (GPO) and navigate to Computer Configuration → Policies → Windows Settings → Security Settings → Restricted Groups.
Right-click in the blank area and select Add Group.
Type “Remote Desktop Users” or browse to select the group from your domain.
Once the Remote Desktop Users group is added to your Restricted Groups policy, you’ll see two options for configuration. Use the Members of this group section to specify who should have RDP access. You can add individual user accounts, but for efficiency, it’s better to add existing security groups that already include your remote users. For example, adding a role-based group like “IT Support” ensures that all members of that group automatically gain the necessary permissions. When the Group Policy refreshes, Windows will apply these changes to the target computers.
Best Practices for Managing User Access
Managing Remote Desktop access requires balancing ease of use with security. Instead of adding individual users directly to the Remote Desktop Users group, create dedicated security groups in Active Directory that align with your organization’s structure. For example, you might create groups like “Remote Workers”, “IT Administrators”, or “Help Desk Staff.” This approach simplifies permission management as employees change roles or leave the organization.
To enhance security, ensure that Network Level Authentication (NLA) is enabled. This requires users to provide valid credentials before they can even see the login screen, reducing the risk of unauthorized access.
Regular audits are essential. Periodically review who has Remote Desktop permissions by checking the members of the Remote Desktop Users group on target computers. You can use PowerShell commands like Get-LocalGroupMember "Remote Desktop Users" to quickly inspect access across multiple systems.
Keep in mind that granting RDP access allows users to log on locally to the target computer, giving them the same level of access as if they were physically present. To minimize risks, always apply the principle of least privilege – only grant access to users who genuinely need it for their job.
With user access configured through Restricted Groups, you can now apply these GPO changes and test them on your target systems to ensure everything works as expected.
sbb-itb-bea6502
Applying and Testing Group Policy Changes
With your Remote Desktop settings configured and user permissions in place, the next step is rolling out these changes to your target computers and ensuring everything works as intended. This involves linking your Group Policy Object (GPO) to the correct location in Active Directory, updating policies, and verifying the setup.
Linking the GPO to Your Domain or OU
Your Group Policy Object won’t take effect until it’s linked to a specific Organizational Unit (OU) or domain. This step determines which computers will receive your Remote Desktop configuration.
To begin, open the Group Policy Management Console on your domain controller. Make sure you have administrative privileges. Navigate to Start, select Administrative Tools (or Windows Administrative Tools on newer versions), and then choose Group Policy Management.
In the console, locate the OU that contains the computers you want to configure. Right-click the target OU, select Link an Existing GPO, and choose your “Enable Remote Desktop” GPO.
To further refine the scope, you can apply security filtering. Create an Active Directory security group that includes the computers you’re targeting, then use the GPO’s Scope tab to ensure the policy applies only to that group. Once linked, you’re ready to push the updates to your domain.
Forcing Group Policy Updates
After linking your GPO, enforce the changes immediately by forcing a Group Policy update. On each target computer, open Command Prompt with administrative privileges and run the following command:
gpupdate /force
This ensures the policies are applied right away and provides feedback on processed settings or errors. If you’re working with multiple computers, you can use PowerShell remoting or the Group Policy Management Console to trigger updates across all systems at once.
Checking if Remote Desktop is Working
Once the updates are applied, it’s critical to confirm that Remote Desktop is functioning as expected. Here are a few methods to verify the configuration:
System Properties Check: Press Windows + R, type sysdm.cpl, and hit Enter. Go to the Remote tab. The “Enable Remote Desktop on this computer” option should be selected and grayed out, indicating the policy is in effect.
Service and Firewall Verification: Use sysdm.cpl to ensure Remote Desktop is enabled, and check the status of the Remote Desktop service with the PowerShell command:
Get-Service TermService
Confirm that firewall rules allow Remote Desktop connections.
Connectivity Test: From another computer, open the Remote Desktop Connection client, enter the target computer’s IP address or hostname, and log in using credentials from a user in the Remote Desktop Users group.
If you encounter connection issues, check the Event Viewer on both the client and target computers. Look for Remote Desktop-related events in the System and Application logs to troubleshoot authentication, network, or policy conflicts.
Once testing confirms everything is working, you can rest assured that your centralized settings are active across your domain.
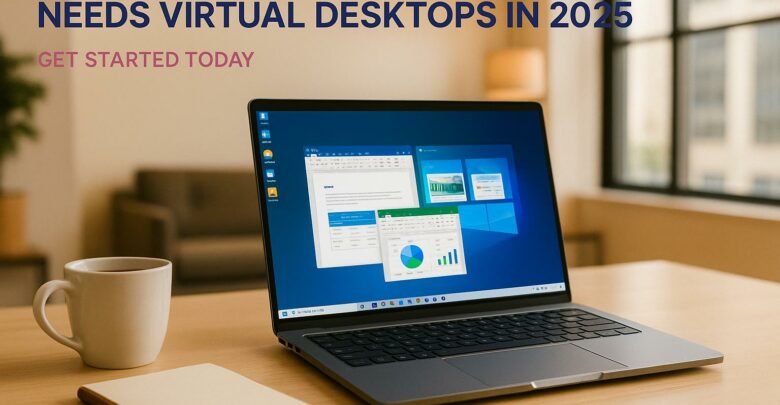
Using Remote Desktop with flexidesktop Cloud Solutions
If you’ve already streamlined Remote Desktop Protocol (RDP) configurations using Group Policy Objects (GPO), flexidesktop takes that efficiency to a whole new level by moving it into the cloud. By building on your centralized GPO setup, flexidesktop extends these capabilities into a cloud environment. Many businesses are now choosing to either complement or replace their on-premises RDP setups with cloud-hosted desktops. Why? Because it reduces administrative headaches while boosting security and scalability.
Benefits of Using Group Policy with flexidesktop
Pairing your existing Group Policy expertise with flexidesktop’s cloud infrastructure combines familiarity with modern convenience. Windows Virtual Desktop instances come preconfigured for RDP but still allow for custom Group Policy settings to meet your specific needs.
flexidesktop provides dedicated resources like CPU, RAM, and storage, with optional GPU support in select plans. This ensures reliable performance for remote sessions, no matter what other tasks are running. Plus, the platform includes automated daily backups, eliminating the need for manual GPO backup configurations.
The service supports both VPN and RDP access, offering flexibility for users. You can even connect flexidesktop instances to your existing Active Directory, which means your carefully designed Group Policy Objects will work seamlessly in the cloud environment.
Need Office 2024 Pro Plus? flexidesktop offers it as an optional add-on at a low monthly cost, often cheaper than maintaining Office licenses across multiple physical machines. The platform also handles custom software installations, so you can skip deploying applications through Group Policy software installation policies.
These features make it clear why many organizations are rethinking their on-premises setups in favor of the streamlined efficiency offered by cloud-hosted desktops.
On-Site vs. Cloud-Hosted Solutions: Key Differences
When comparing on-premises Group Policy management to using flexidesktop, the differences in operational workload are striking. With a traditional setup, you’re responsible for maintaining domain controllers, managing Windows updates, and ensuring stable network connectivity across all machines.
flexidesktop, on the other hand, shifts these responsibilities to a fully managed cloud infrastructure with global data center availability. Users can connect directly through a web browser or an RDP client, cutting down on troubleshooting time.
Aspect
On-Premises GPO
flexidesktop Cloud
Setup Time
Hours to days for policy deployment
Minutes to provision new desktops
Hardware Management
Requires physical servers and networking equipment
Fully managed by flexidesktop
Scaling
Limited by hardware capacity
Instant scaling with flexible plans
Backup Management
Manual GPO configuration needed
Automated daily backups included
Security Updates
IT team manages updates
Platform handles updates automatically
Cost is another major factor. On-premises setups come with recurring expenses for server hardware, Windows Server licensing, and IT staff time for maintenance. flexidesktop, by contrast, offers flexible monthly plans that scale with your needs, helping to control costs.
Security is also simplified. flexidesktop’s isolated private networks provide robust protection that would typically require complex GPO configurations in an on-premises environment. Each virtual desktop operates in its own secure space while still allowing integration with local devices for printing and file access.
As an administrator, you’ll still have full control over your virtual desktops. This means you can implement Group Policy settings, install software, and configure security policies just as you would on physical machines. But the heavy lifting of managing the underlying infrastructure is handled by flexidesktop’s technical support team.
For companies already managing Remote Desktop through Group Policy, flexidesktop isn’t a replacement for your skills – it’s an upgrade. Your expertise in Windows administration and GPO management transitions seamlessly into this cloud-based system, offering reduced maintenance demands and greater reliability.
Conclusion
Using Group Policy to set up Remote Desktop simplifies remote access management for IT administrators working with Windows devices. Instead of configuring each machine individually, Group Policy provides centralized control, cutting down on errors and saving valuable time. It allows you to enable Remote Desktop on multiple devices at once, enforce consistent security protocols, and manage user permissions through the Group Policy Management Console [1].
As your organization grows, scalability becomes a key factor. Group Policy automates essential deployment tasks and applies standardized settings to new users and devices, enhancing productivity while efficiently handling expanding RDP deployments [5].
To maintain a streamlined and secure setup, dedicating Organizational Units specifically for Remote Desktop Services servers allows for precise control over configurations without disrupting other parts of the network [2]. Pairing this with Group Policy loopback processing ensures a consistent user experience and a well-managed remote access environment [2].
That said, managing an on-premises infrastructure comes with its responsibilities, like maintaining domain controllers, applying regular Windows updates, and ensuring reliable network connectivity. On the other hand, as previously discussed, cloud-hosted solutions such as flexidesktop can ease these challenges. These platforms reduce maintenance requirements, offer secure daily backups, and leverage your existing Windows administration skills in a more flexible environment. This makes it easier to transition from on-premises management to the cloud while maintaining efficiency.
Ultimately, whether your organization opts for on-premises management or moves to the cloud will depend on your specific infrastructure needs. Both approaches, however, benefit from the structured and systematic capabilities that Group Policy provides.
FAQs
What are the benefits of using Group Policy to enable Remote Desktop on Windows 10/11?
Using Group Policy to enable Remote Desktop offers IT administrators a streamlined way to manage multiple machines within an Active Directory environment. By centralizing configuration, it ensures that all targeted computers maintain consistent settings, significantly reducing the risk of errors that can occur with manual adjustments.
This method is particularly useful for scaling, as administrators can automatically apply changes to numerous devices without needing to configure each one individually. On top of that, Group Policy bolsters security by enforcing access restrictions – such as granting Remote Desktop access only to specific user groups – and setting uniform firewall rules. These capabilities make it a practical and secure choice for managing Remote Desktop settings in professional settings.
How can I securely enable Remote Desktop using Group Policy?
To keep Remote Desktop connections secure with Group Policy, start by enabling Network Level Authentication (NLA). This step ensures users must authenticate before a session begins, making unauthorized access far less likely. Pair this with strong encryption settings for RDP and, if possible, use SSL/TLS certificates to encrypt communication.
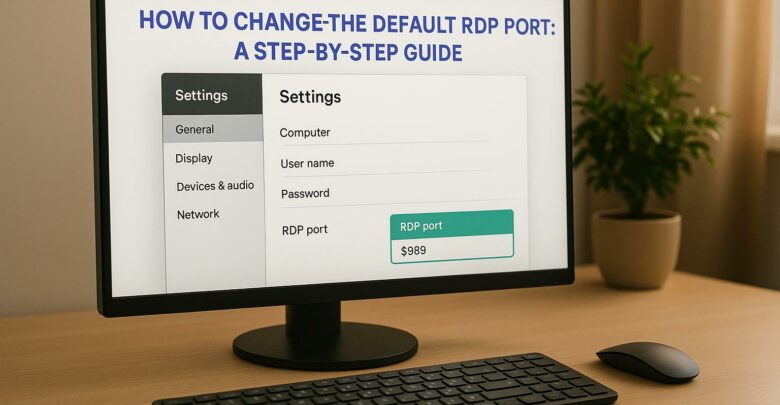
Limit access to only those in the Remote Desktop Users group, and for an extra layer of security, change the default RDP port to a less common one. Adding multi-factor authentication (MFA) is another powerful way to boost protection, requiring users to complete an additional verification step. Together, these actions can significantly reduce the risk of unauthorized access and attacks on RDP sessions.
What should I do if Remote Desktop still doesn’t work after applying Group Policy settings?
If you’re having trouble with Remote Desktop after applying Group Policy settings, there are a few key steps to troubleshoot the problem. First, confirm that the policy was applied correctly by running gpresult /v on the client machine. This command will show you which policies are in effect.
Next, make sure the Remote Desktop Service is running. You can do this by opening the Services app and locating the service. Additionally, check that the firewall rule Remote Desktop (TCP-In) is enabled, as a blocked firewall rule can prevent RDP connections.
If the problem continues, try rebooting the client machine and running gpupdate /force to refresh the policies. Don’t forget to investigate potential network connectivity issues or conflicting Group Policies that might be overriding your settings. Following these steps should address most common issues with Remote Desktop not functioning properly after applying Group Policy settings.
Explore how GPU-accelerated virtual desktops are revolutionizing architecture firms by enhancing collaboration, reducing costs, and improving rendering efficiency.
Explore the differences between on-premises and hybrid VDI, examining their costs, scalability, and security to find the best fit for your business needs.
To provide the best experiences, we use technologies like cookies to store and/or access device information. Consenting to these technologies will allow us to process data such as browsing behavior or unique IDs on this site. Not consenting or withdrawing consent, may adversely affect certain features and functions.
Functional
Always active
The technical storage or access is strictly necessary for the legitimate purpose of enabling the use of a specific service explicitly requested by the subscriber or user, or for the sole purpose of carrying out the transmission of a communication over an electronic communications network.
Preferences
The technical storage or access is necessary for the legitimate purpose of storing preferences that are not requested by the subscriber or user.
Statistics
The technical storage or access that is used exclusively for statistical purposes.The technical storage or access that is used exclusively for anonymous statistical purposes. Without a subpoena, voluntary compliance on the part of your Internet Service Provider, or additional records from a third party, information stored or retrieved for this purpose alone cannot usually be used to identify you.
Marketing
The technical storage or access is required to create user profiles to send advertising, or to track the user on a website or across several websites for similar marketing purposes.